

Published on September 26, 2022
14 min to read
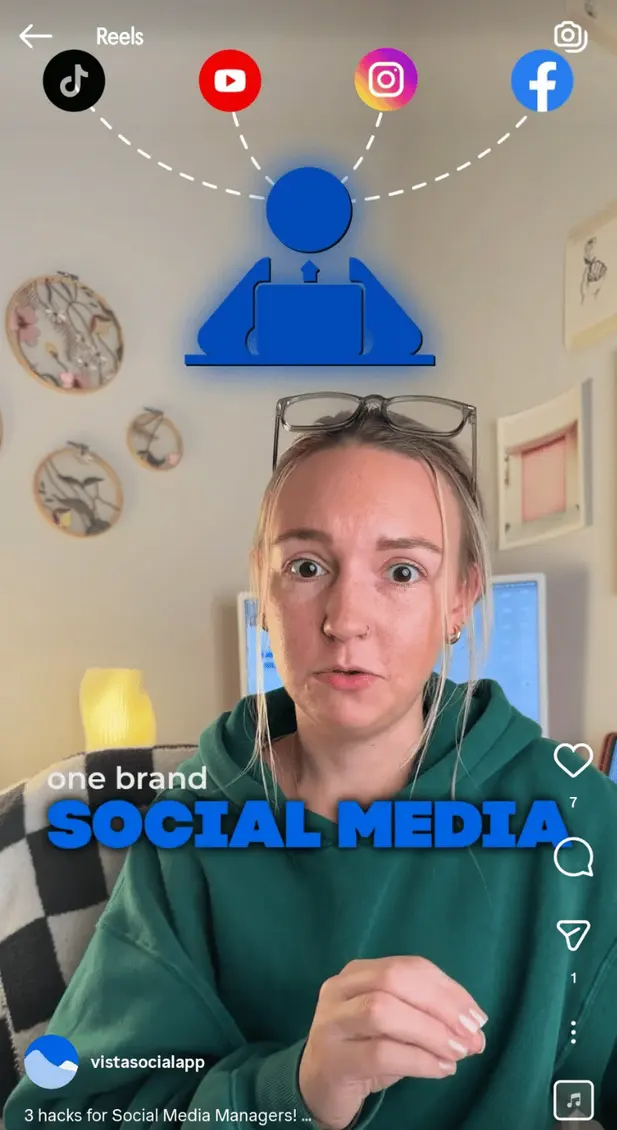
How to Make a Reel with Photos on Instagram

Summarize with AI


Table of contents
Summarize with AI

ChatGPT

Claude

Perplexity
Share

Vista Social

X (Twitter)


Anyone can learn how to make a reel with photos, but our six-step guide below shows you how to do it in record time. You don’t need to buy or use third-party apps to make reels on Instagram using only photos. However, leveraging certain tools will take your Instagram Reels marketing several levels higher.
Stick around until the end of this IG Reels tutorial for proven tips for promoting photo-only reels.If you are also curious about privacy while creating content, you may want to read does Instagram notify when you screenshot a story to understand what Instagram actually tracks.
Let’s get this show on the road.
Table of contents
What Are Instagram Reels?
Instagram Reels help you share entertaining or educational content while reaching people outside your existing follower base.
Customize your Reels using effects, filters, stickers, layouts with carefully chosen audio clips to create a unique viewing experience. If you don’t want to record Reels from scratch, you can remix existing Reels when the original creator has remixing enabled, though availability and reach can vary.
You can also upload photos or clips from your device. Editable templates can help you build engaging content faster, though availability and layout options may vary by region or by how Instagram is testing features at the moment.
Unlike Instagram Stories and feed posts, your reels can be found by users even if they don’t follow your (or your client’s) account.
Reels can be discovered through the Reels tab and Explore, with Instagram primarily surfacing content based on relevance and how people interact with it rather than follower count. Follower count is not a prerequisite for visibility. Engagement signals and content relevance matter far more at the discovery stage.
Another key difference between Instagram Reels vs Stories comes down to how long your content can be. That time limit shapes how the story unfolds and how viewers experience the flow of your message.
While Instagram Stories can now run up to 60 seconds per clip, Reels generally support longer-form content, with 90 seconds remaining the most widely supported length and longer formats available only to select accounts or regions. This gives you more flexibility when sharing step-by-step content and more in-depth explanations.
How to Make a Reel With Photos for Instagram
Here’s how to create Instagram Reels using photos:
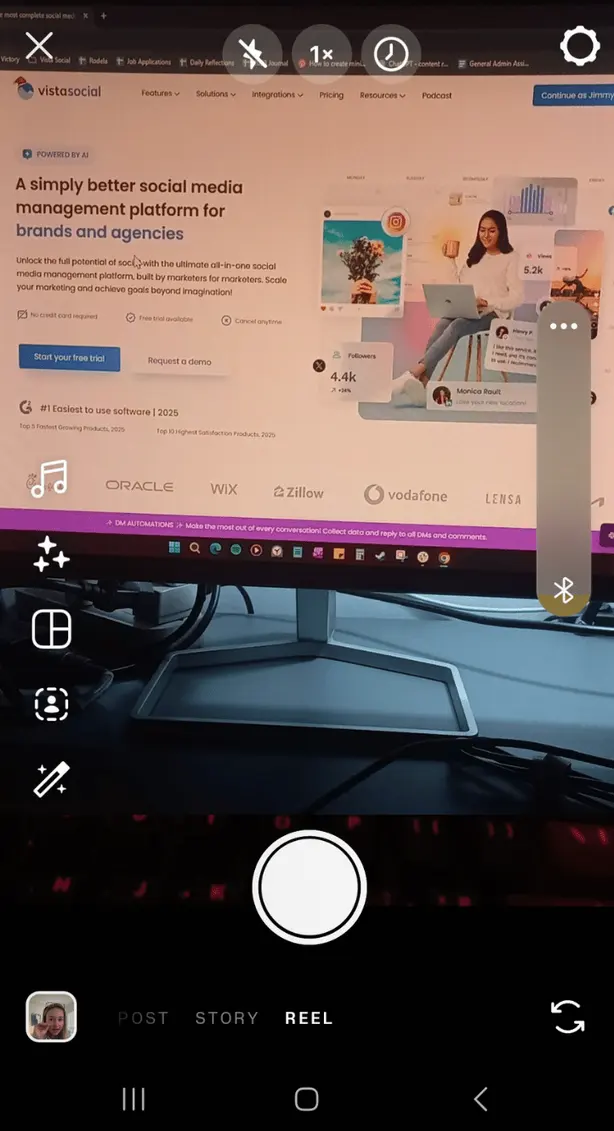
1. Launch the Instagram app
Launch the Instagram app from your device.
2. Create a new Reel
Tap the create option inside the Instagram app to start a new Reel.
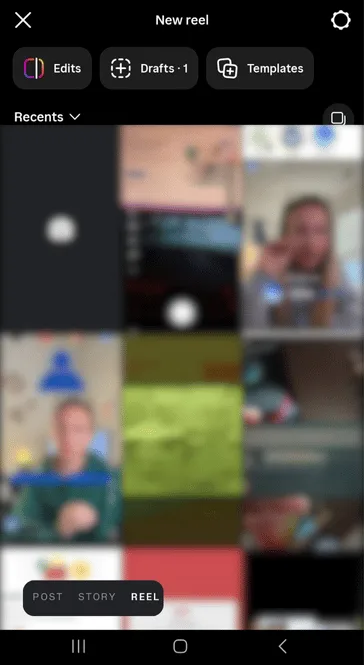
3. Open your device’s gallery
Open your device’s photo gallery from within the Reel editor to select images for your Reel.
4. Choose the photo you want to use
Select the photo you want to use in the gallery view for your reel. Confirm your photo selection to add it to your Reel timeline. Instagram will automatically apply the image as your reel’s background.
5. Build the rest of your Instagram Reel
Use the toolbar on the bottom to use Instagram’s array of reel editing tools. Add text. Use stickers. Layer in drawings. Apply filters. Experiment with effects. Explore other creative options available inside the editor.
You can trim your Reel using the Edit option and add background music by selecting audio from the Reel editor, with placement and options varying by app version.
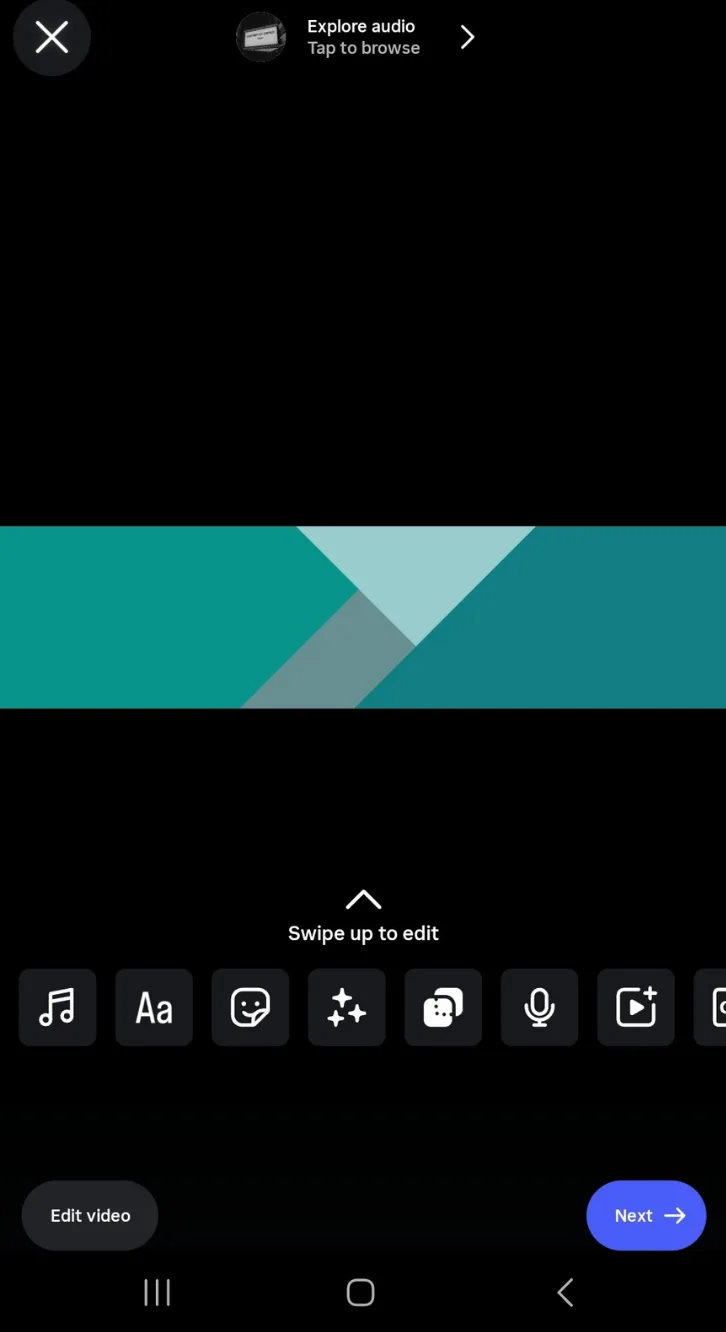
Click Next when you’re done.
6. Finish sharing your Instagram Reel
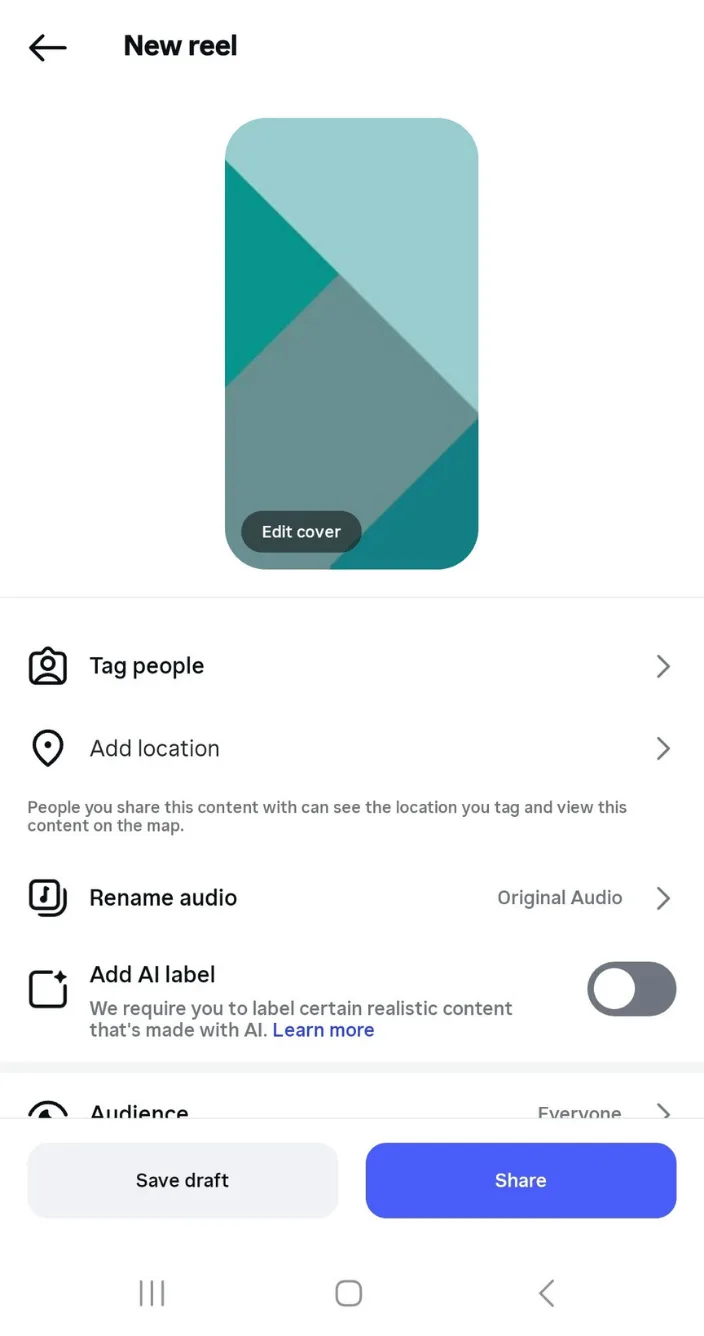
On the “New reel” page, you can write a caption, insert hashtags, create a poll, tag other users, add location information, and specify the audience.
You can also specify where to display the Reel in the profile and add AI labels. Instagram assigns a default display time to each photo, then adjusts that timing automatically as your Reel takes shape during the editing process.
If you create a Reel with just one photo, you need to be intentional with text overlays or subtle motion because single-image Reels move quickly by default. You can extend your reel’s length by adding more photos from your camera roll.
How to Make Instagram Reels With Multiple Photos
The steps in how to make a Reel with multiple photos are straightforward. If you are also planning to publish photo-based content outside of Reels, understanding how direct publishing Instagram carousel works can help you streamline your workflow.
Return to the Reel editor and open your photo gallery to add more images. To add multiple photos, tap the Select multiple photos option (two overlapping squares icon) on the top right corner of your screen.
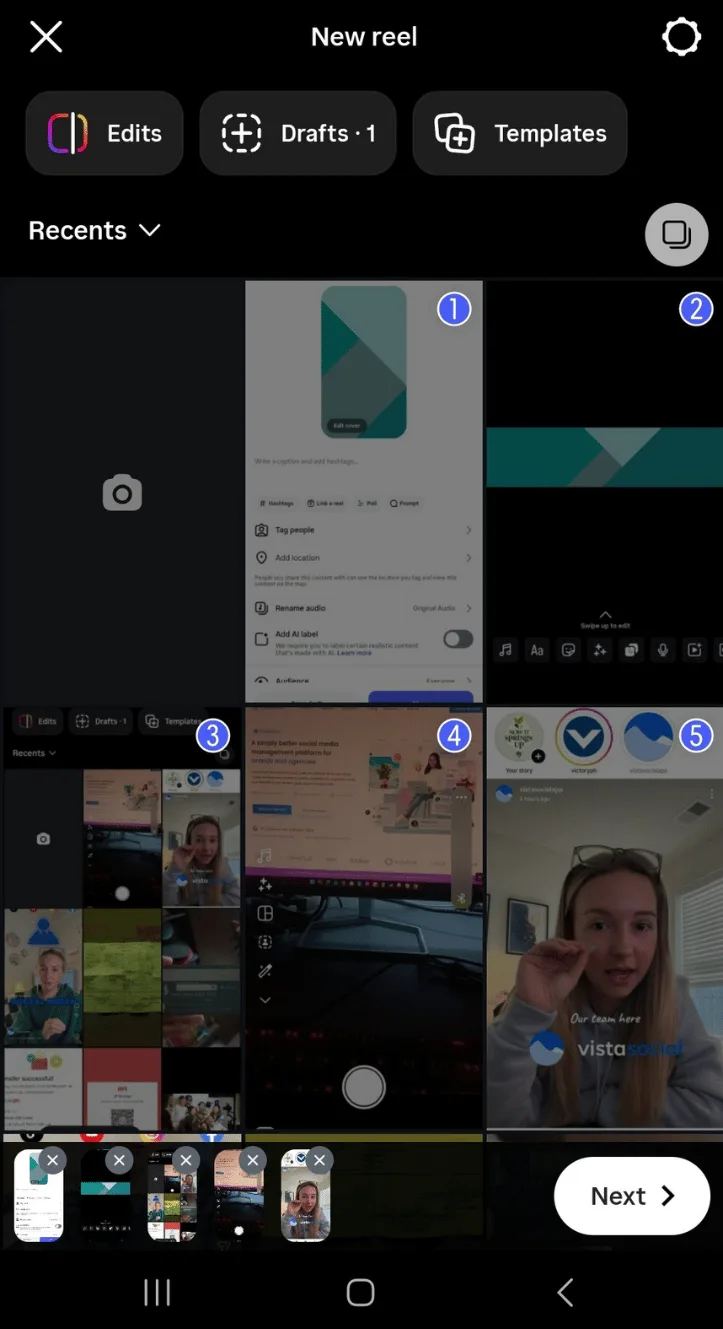
Tap the circles on the images you want to add to your reel. The same process applies if you want to post more than one photo on Instagram as a feed post or Story.
Tip: The timeline bar at the bottom should show the order of your reel photos. You can tap a photo, then reposition it to change the order it appears in your reel.
How many pictures can you post on Instagram Reels?
Instagram allows a high number of photos in a single Reel, but the exact limit and performance can change depending on how your Reel is created and how the platform currently behaves. However, Reels with fewer, more intentional images often perform better since viewers are more likely to watch through to the end.
That gives you plenty of flexibility, though keeping your Reel focused usually leads to stronger engagement. With multiple Instagram photos in a reel, you can create a comprehensive slideshow-type reel, showcase results with a voiceover, share event highlights with background music, etc.
Note: You can also include video clips in a photo-based Reel. Instagram automatically adjusts clip and photo timing so everything fits within the current Reel length limits.
How to Make Instagram Reels With Photos Using Tools
Another way to make an Instagram photo reel is to weave the images together into a video file. Use free tools like Canva to do this. If you want more flexibility beyond basic editors, exploring dedicated IG tools can help you streamline creation and scheduling while keeping performance easier to track.
Reasons to Use Canva
Here’s why we recommend Canva:
- Free: Canva’s free plan offers a myriad of professional-looking templates. Though the premium plan offers additional templates and images with extra features, you don’t need them.
- Desktop to Mobile: Since using high-resolution images is always encouraged, editing is also almost always done on desktops. With Canva, transferring high-resolution images from your desktop to your mobile device is hassle-free. You can design and edit on your PC, then download and post the final video on your mobile app. Easy-peasy.
- Templates and Transition Options FTW: With so many built-in creative options available, you can create Reels in a jiffy. You can also replicate a design by simply swapping photos for your next reels.
- Diverse Fonts: Match your branding with the myriad of fonts Canva offers.
- Canva for many: Stitching photos into a video with Canva allows you to seamlessly repurpose your reel on other platforms. It also lets you use social media management tools to schedule your reel at optimal times.
Below is a step-by-step guide on how you can use Canva to create Instagram Reels with photos
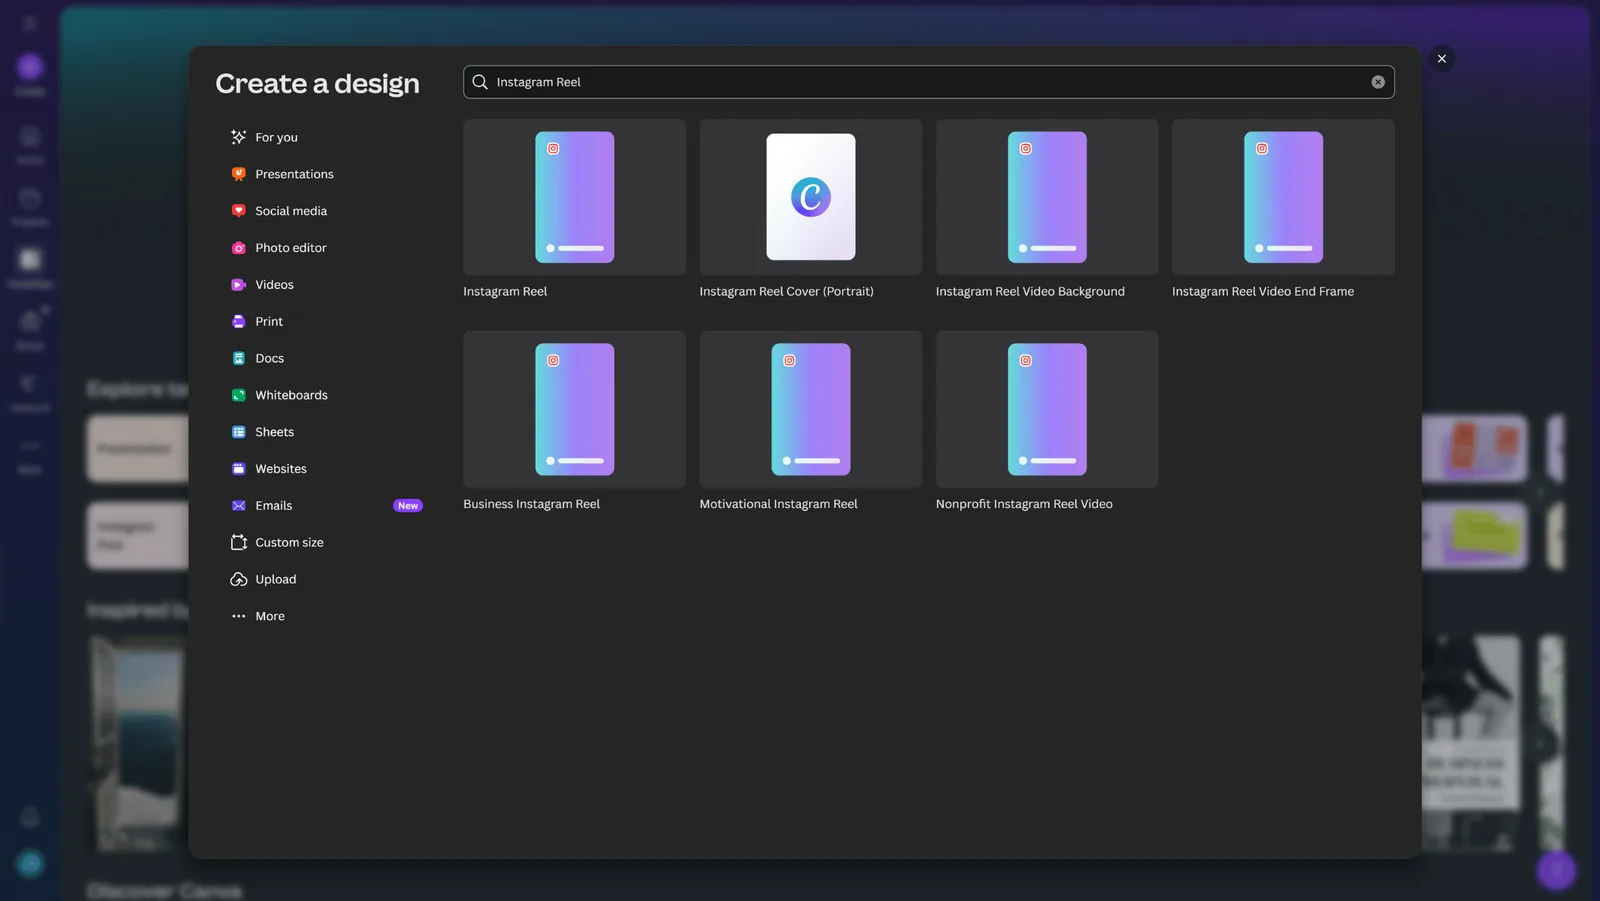
1. Create a new design
On the Canva dashboard, click the ‘Create a design’ button in the upper left corner of your screen.
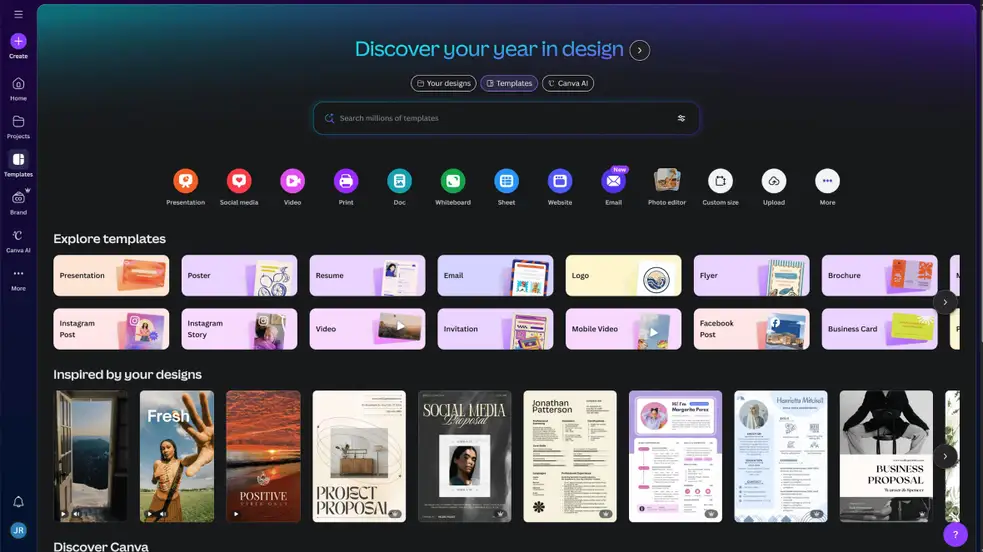
Type in “Instagram Reel” to search for templates and choose your preferred one from the results.
2. Choose a reel template
Canva’s Instagram reel templates all use the same dimensions, allowing you to create precise content that matches the platform’s aspect ratio. However, different templates provide various pre-made layout suggestions. These are fully customizable, covering everything from headers to visual effects to background assets. You can always use the search bar to look for different reel layouts that perfectly suit your photos.
You can also use a blank template and build your reel using just pictures. In which case, skip ahead to creating your reel without clicking on any of the template suggestions.
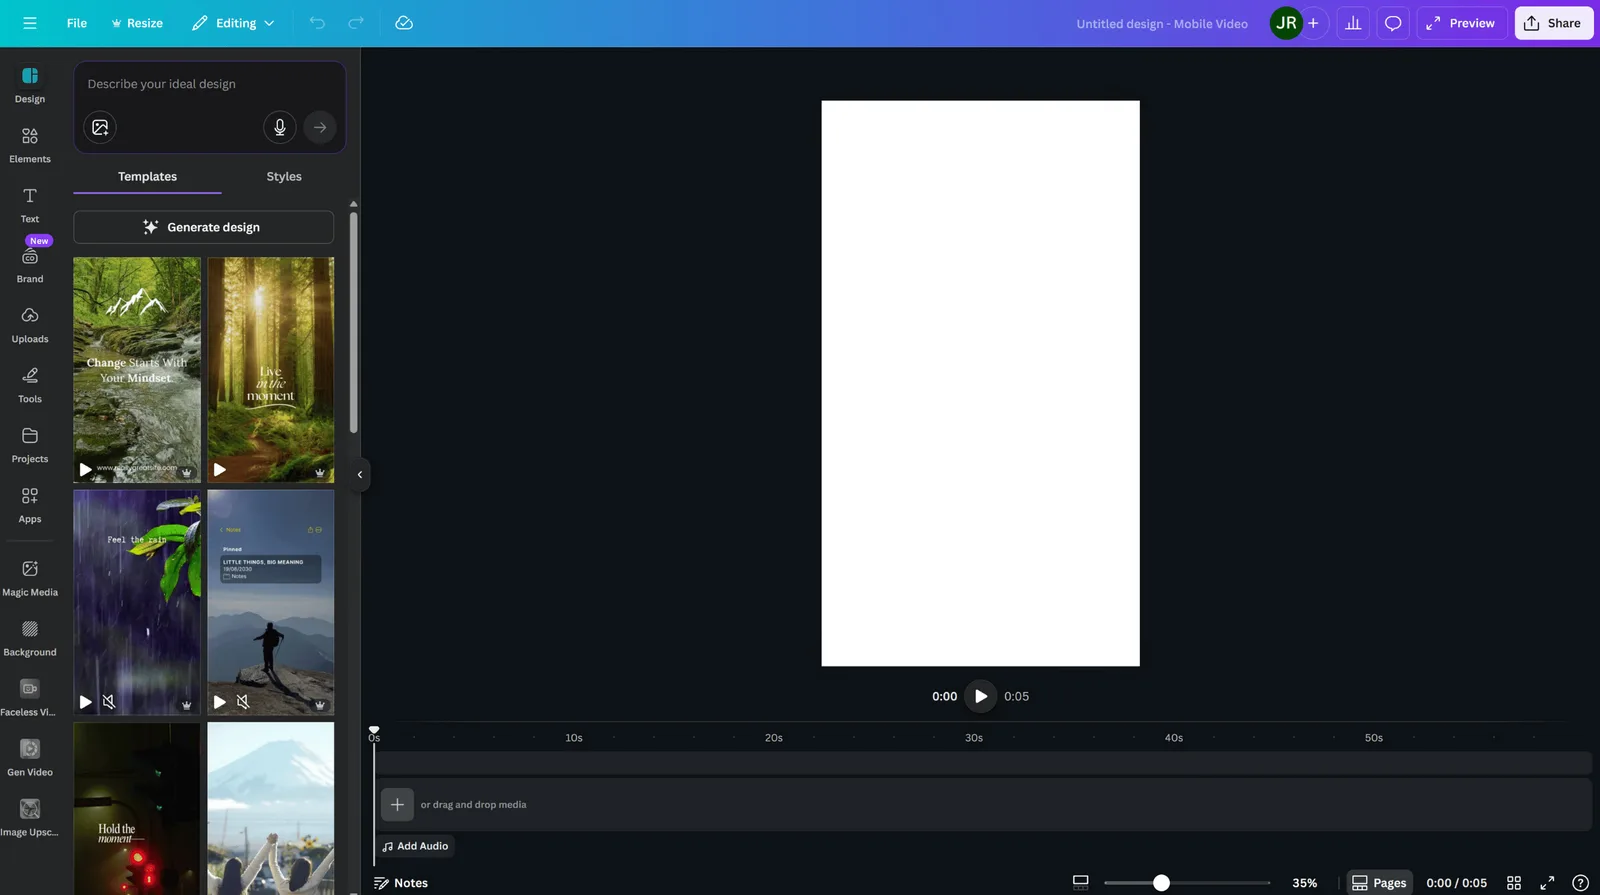
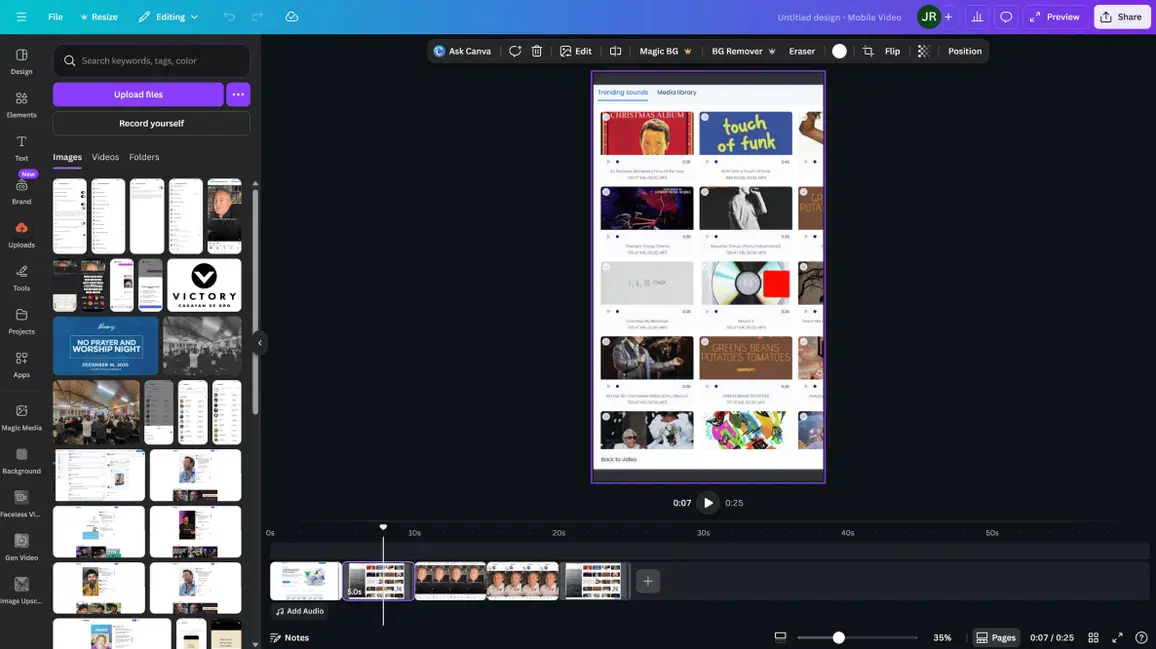
3. Upload your images to Canva
On the Canva editor, drag the images you want to use into the empty page.
Canva automatically assigns a default duration to each page, which can vary by template and animation settings and can be adjusted manually in the timeline. You can fine-tune the display time of individual pages using the timeline below. You can reposition and adjust the image’s size to your liking. Canva’s flexibility lets you add multiple photos to the same page of your reel.
To add a photo as a new page, click the ‘Add page’ button indicated by the plus sign. Drag your photo to the new, blank page to add it to your reel. Repeat these steps to continue adding all the photos to your reel.
Below are tips when creating your reel with Canva:
- Don’t hesitate to use templates: Templates cut the time it takes to create reels by half. They also help you create professional-looking reels with minimal effort.
- Explore animations: Unless you want to add photos for simplicity’s sake, consider applying animations to make your Reel more dynamic. Canva animations like fade or breathe can help add motion and visual interest, making your photos more engaging and more likely to stop someone mid-scroll.
- Take advantage of stylized fonts: A key advantage of creating reels with Canva is the versatile text tools. Use effects like shadows or neon backlights, then elevate key text with bold colored backgrounds.
- Use data visualizations: Beyond visual elements like shapes or logos, Canva makes it easy to insert data visualizations into Reels. You can use charts or graphs to turn data-driven information into something that feels easier to understand for Instagram users.
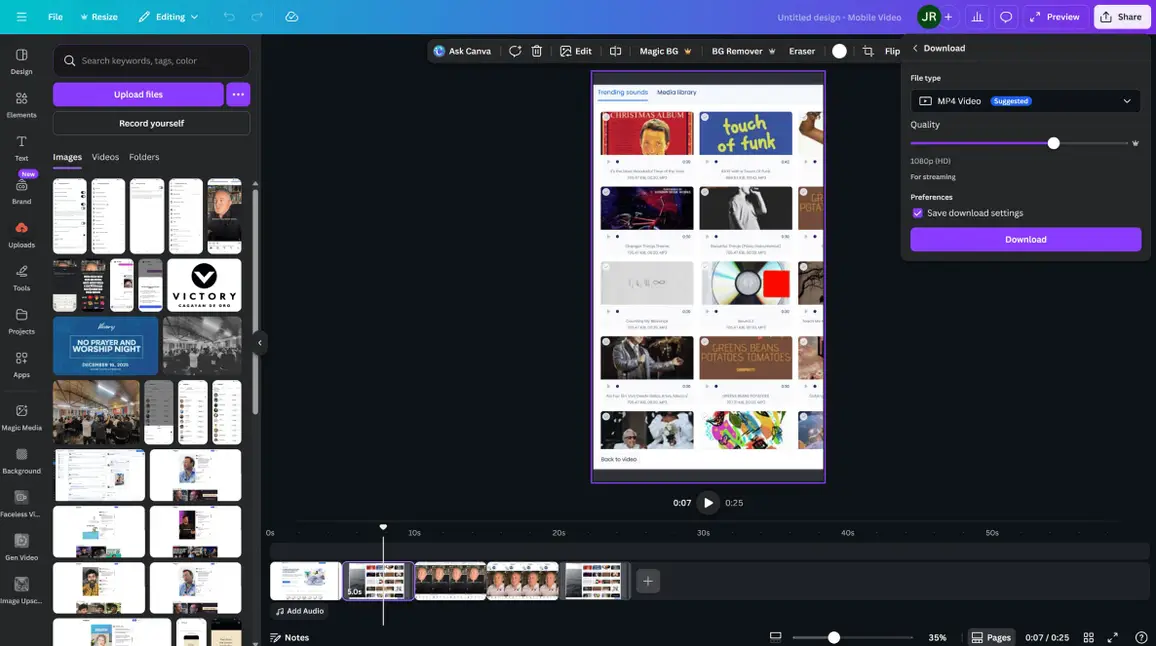
4. Download your Canva design
Once you’re happy with your reel, click ‘Share’ in the upper-right corner of the Canva editor. Select ‘Download’ to save the reel on your device. You can also share the video directly if you link your client’s Instagram account to Canva.

In the download settings window, leave the “File type” drop-down menu to ‘MP4 Video.’ This file type preserves the resolution and clarity of your Instagram reel.
5. Upload (or schedule) your reel
Upload your reel to Instagram using the mobile app. If you are on a desktop device, you can upload Reels directly from the web, though the mobile app still offers the most complete editing and music options, making it the better choice when you need full creative control.
Using Vista Social to schedule your reel is a more convenient and seamless option.
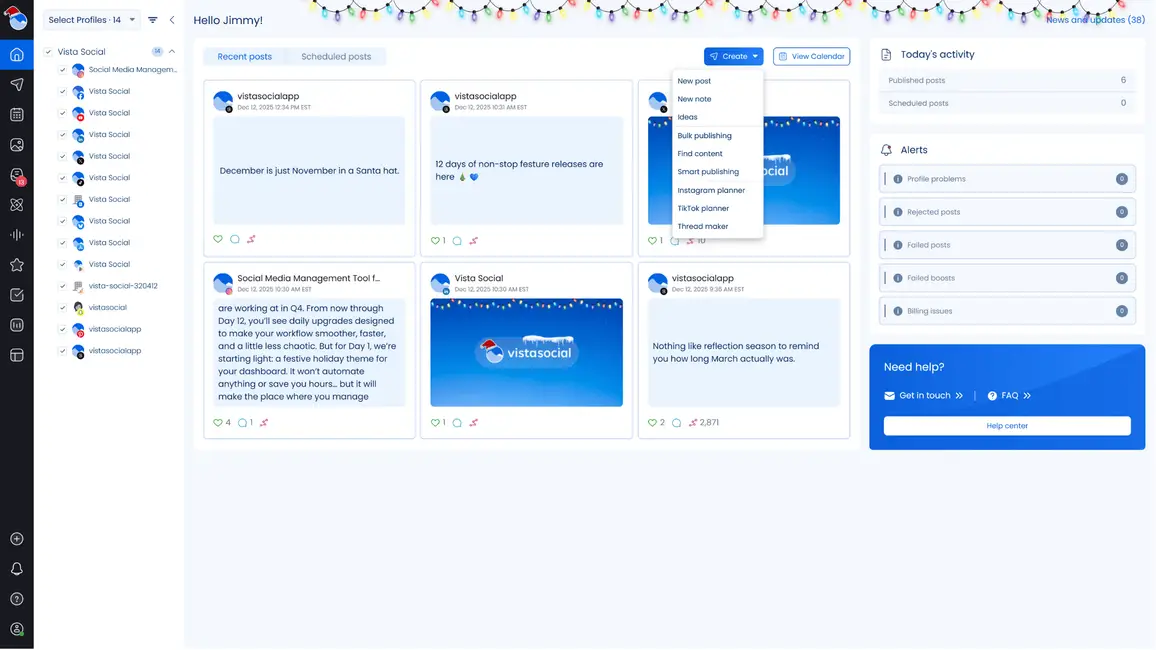
Vista Social is one of the few social media management platforms that feature direct publishing to Instagram Reels via the social media publishing feature. After logging into your Vista Social account, select Create on the left menu and click New post.
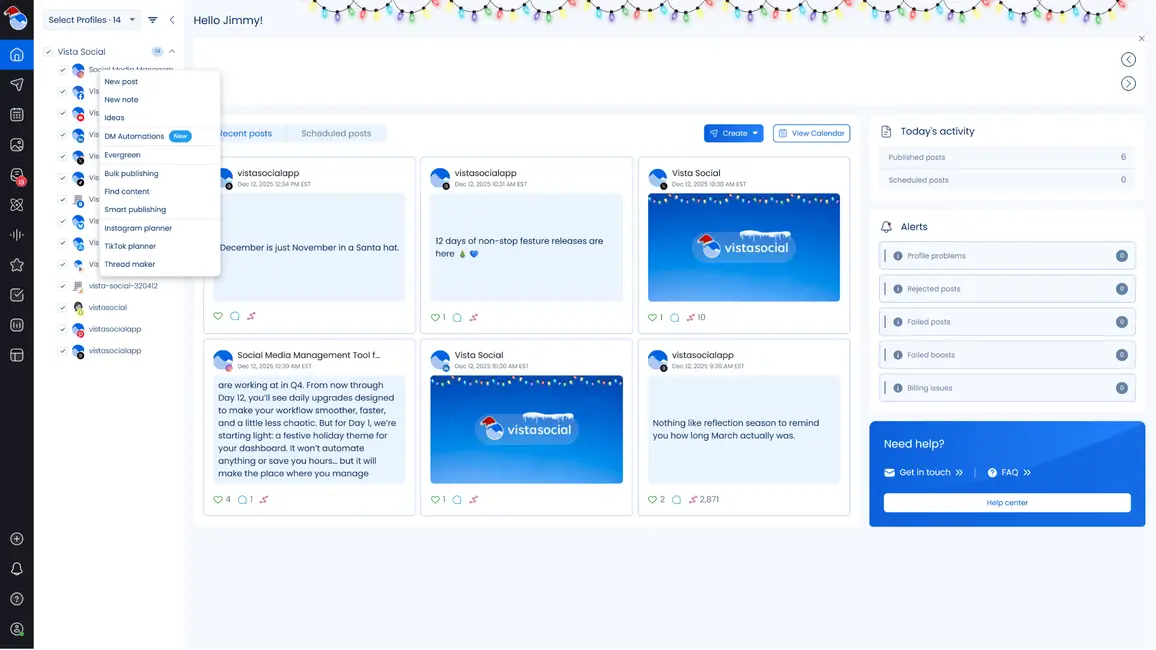
You can also select the New post option from your main dashboard.
In the Publisher window, click the video icon and select where to upload your video. Ensure your client’s Instagram profile is selected under Social Profiles on the left.
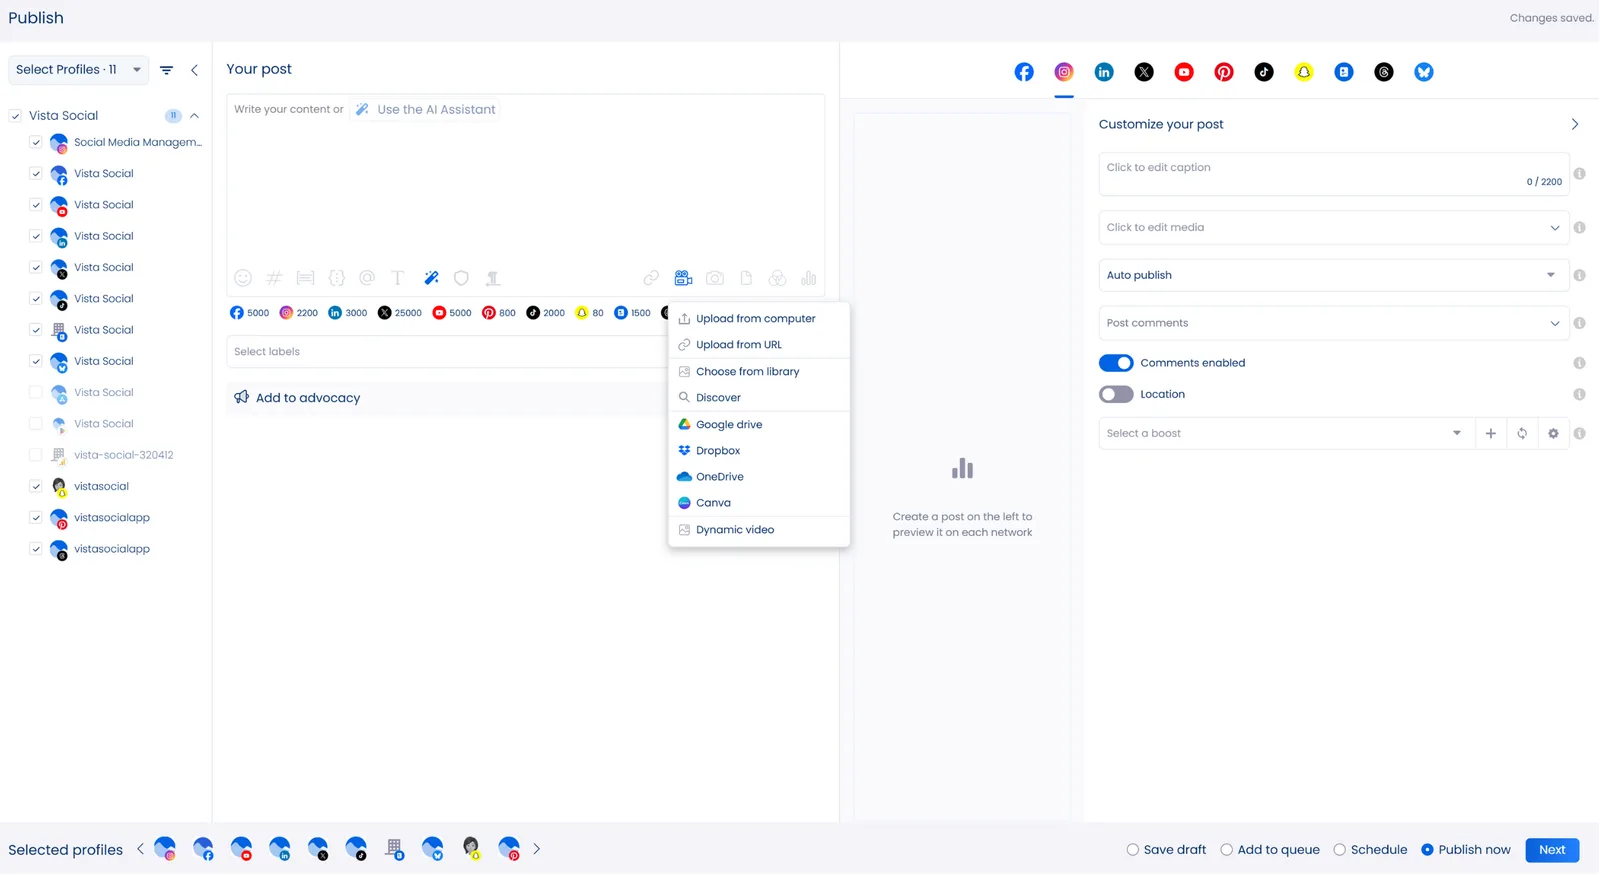
Click ‘Upload from computer’ on the pop-up menu and search for the reel you downloaded from Canva.
A preview of your reel should appear to the right, confirming if you chose the right file. Add the finishing touches to your Reel by making sure everything feels complete and intentional before you publish.
Use Vista Social’s AI Assistant to instantly generate or refine your Reel’s captions with smart suggestions based on your prompts and preferred tone, brand voice, and style.

Need to do last-minute touch-ups to your clients’ videos? Vista Social’s got you covered with its Canva integration. The integration lets you design and edit images and videos using Canva without leaving Vista Social.
You can customize your client’s Reel further by adding user tags, location tags, product tags when applicable to product images. You can also set the post to auto-publish and enable comments. Remember to set the post to Publish as a Reel and enable the Show Reel in Feed option.
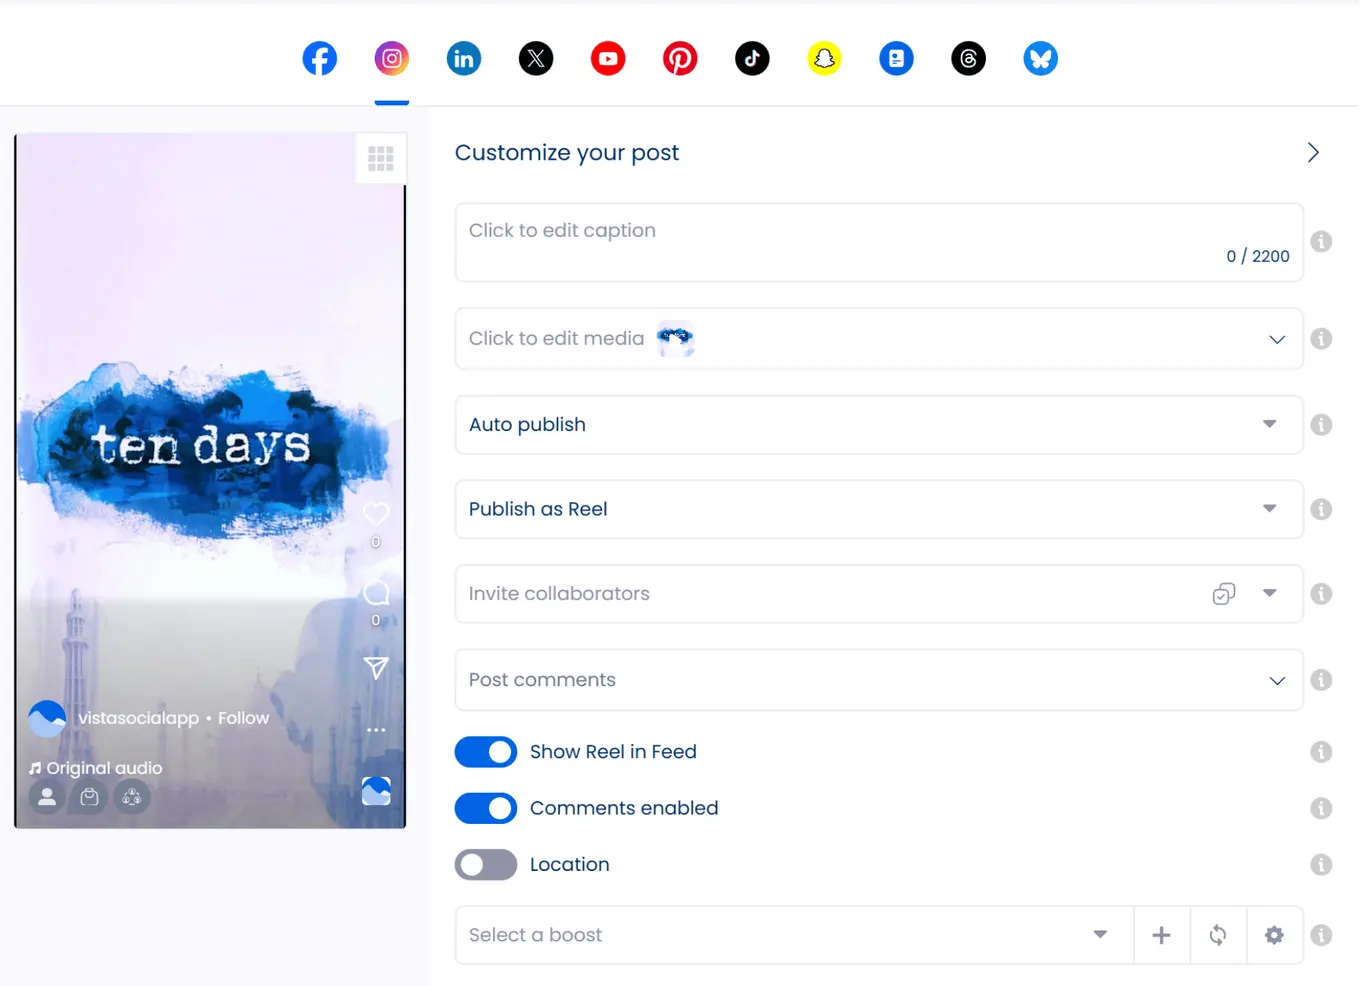
If you don’t want the reel to appear on your client’s Instagram profile, simply switch off the “Show Reel in Feed” toggle. Otherwise, leave this setting as is and proceed with the next step.
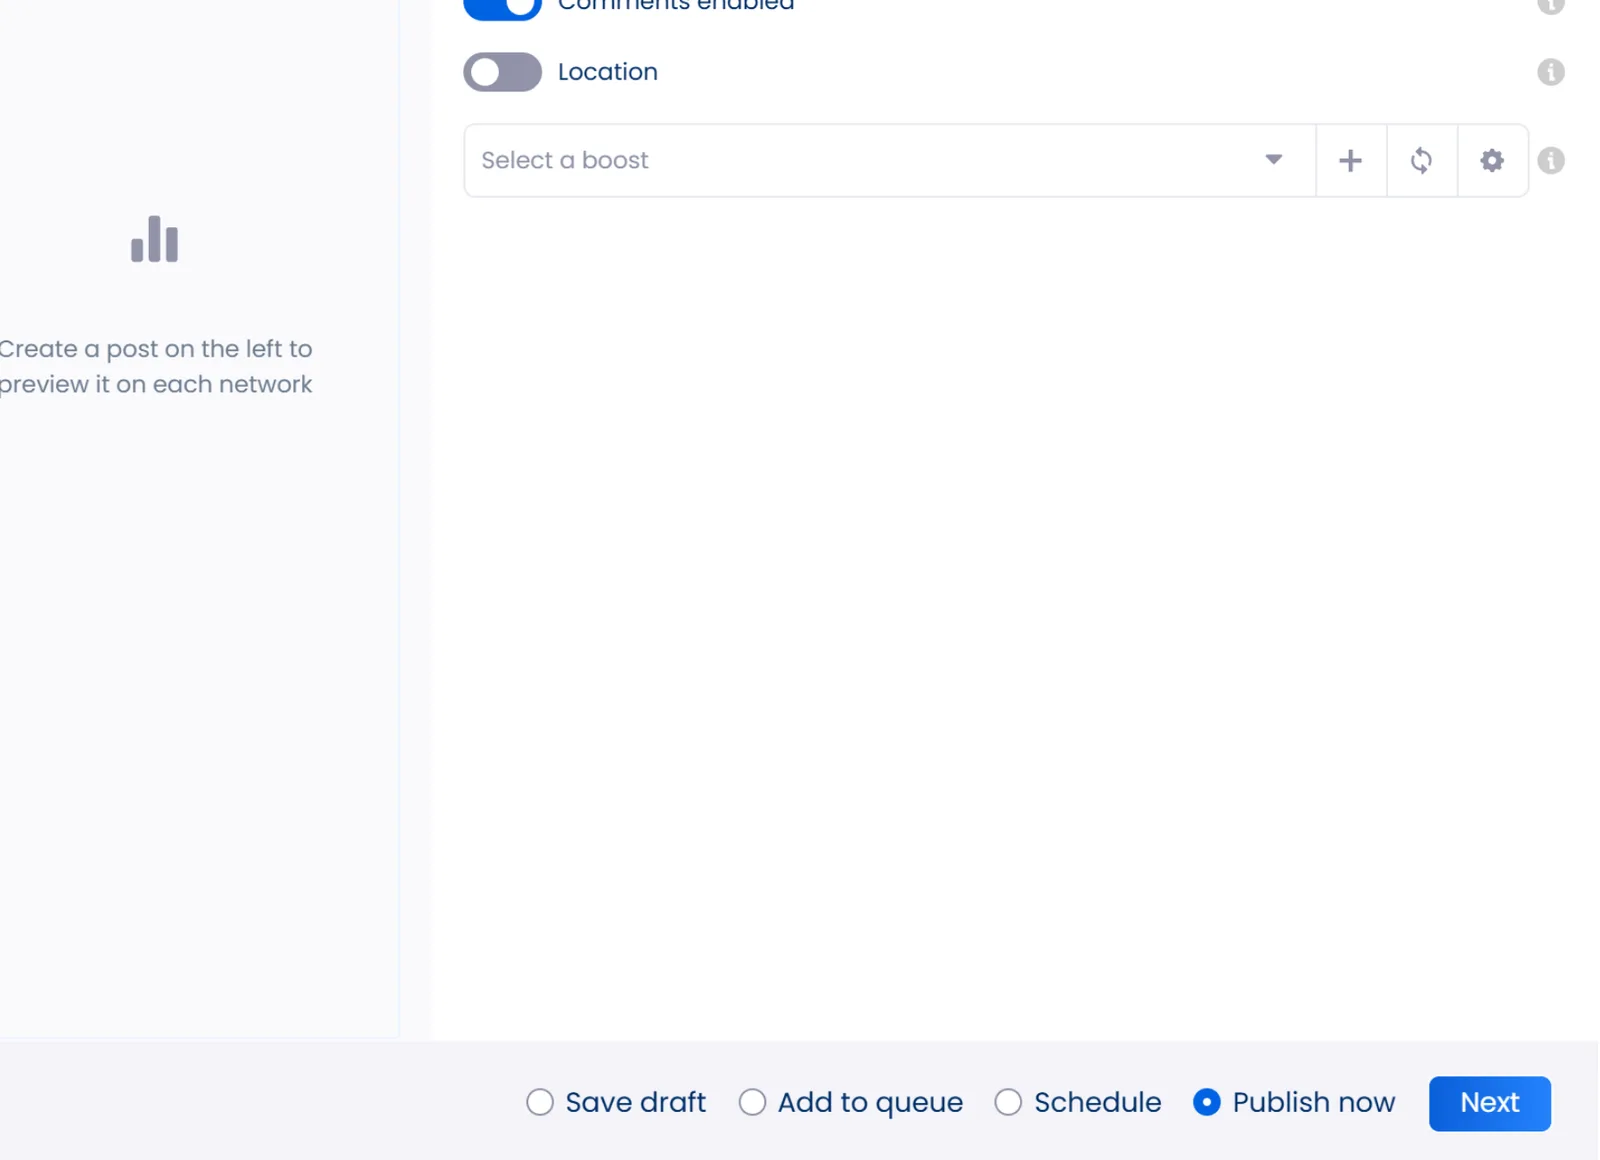
At the bottom of the “Publish” page, select ‘Schedule’ or ‘Add to queue’ (if you already have an automated Instagram posting schedule. You can also save the post as a draft or publish it immediately. If you want to come back and refine it later, understanding how Instagram drafts work can save you time and prevent lost edits.
Click ‘Next’ to proceed. If you choose ‘Schedule,’ you must manually set the publishing time for your reel.
Use the interactive calendar and drop-down menus to set your schedule. Or, click ‘Show optimal times’ and choose from Vista Social’s publishing time suggestions, which are based on your campaign’s past user engagement data and the platform’s optimization algorithms.
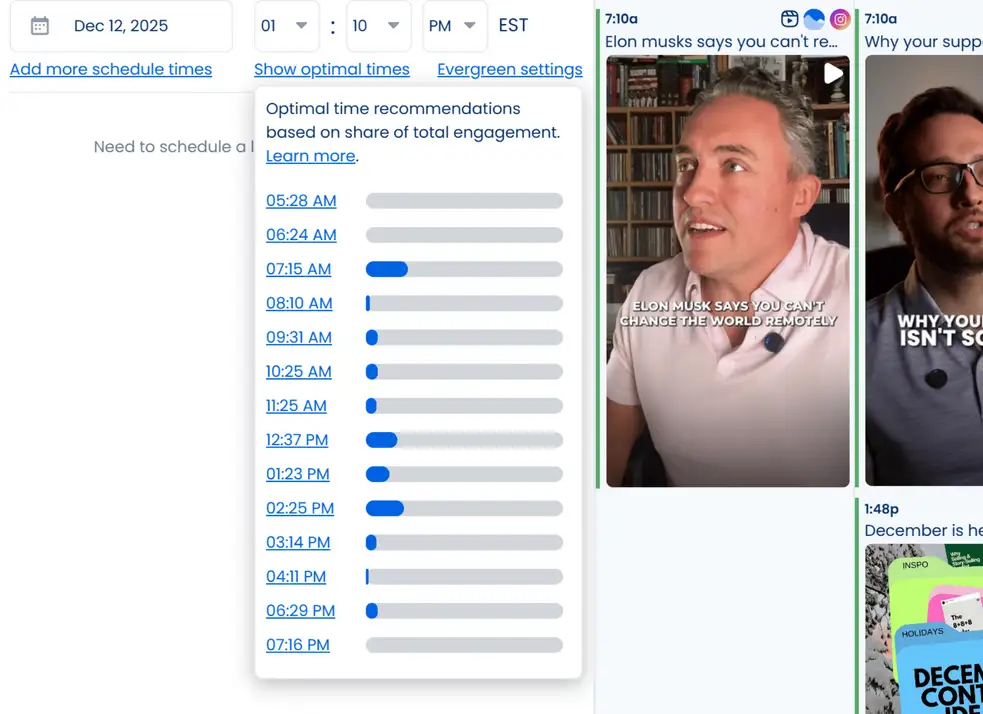
After setting your posting time, click “Schedule.” Your reel will now publish automatically.
But wait, there’s more. Vista Social lets you boost published posts directly from the platform, making it easier to extend reach without jumping between platforms. You can also quickly boost scheduled posts once they go live.
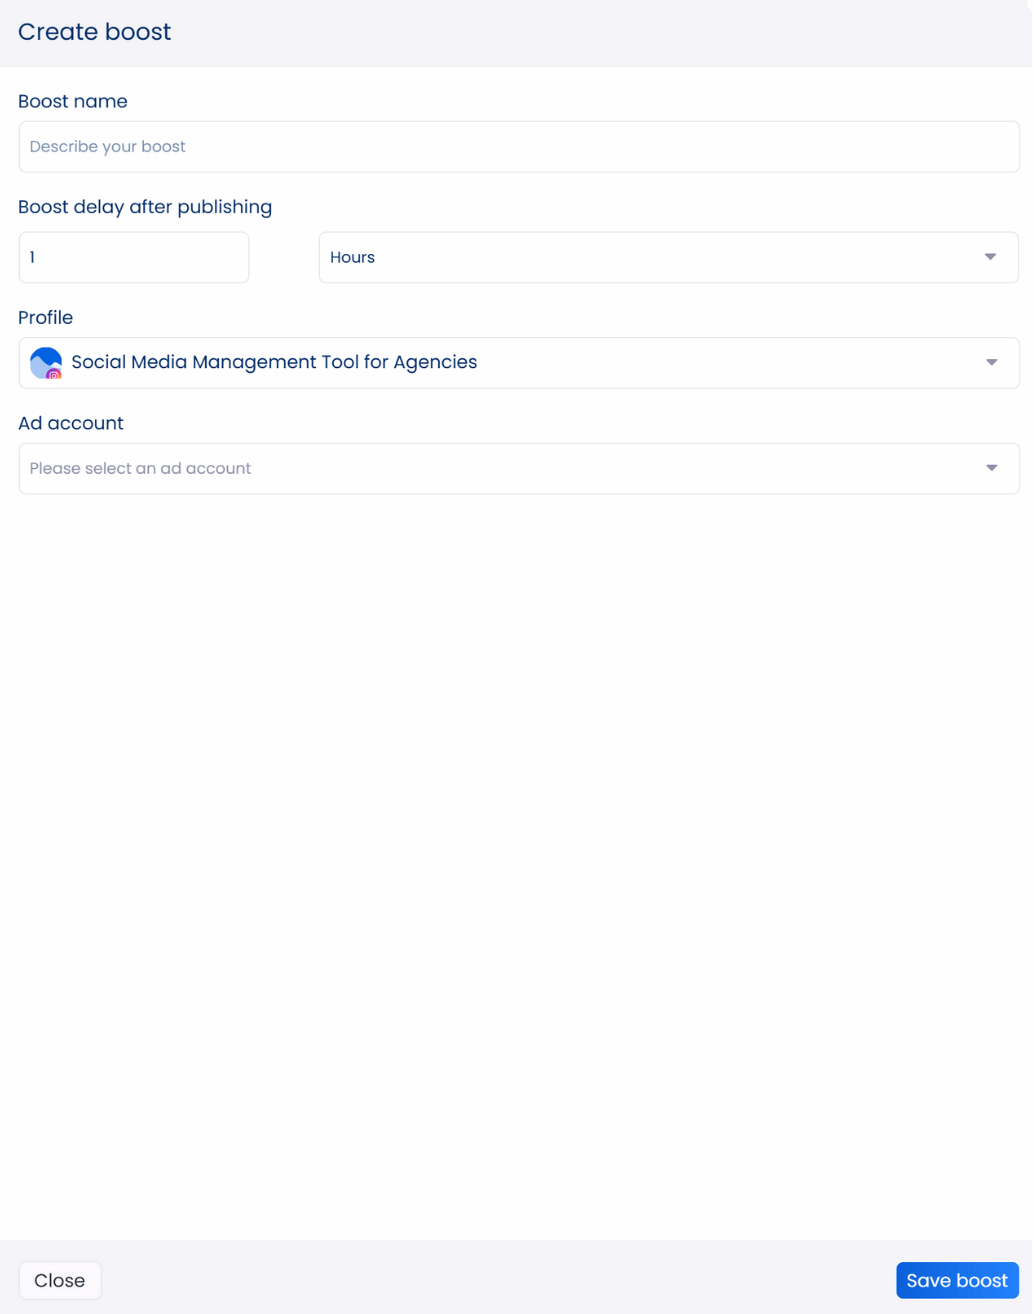
Boosting posts helps attract more attention to your clients’ content by expanding how widely it is seen and how people interact with it.
Important note: You must set up a boost configuration before you can enable it for your posts.
Don’t miss out on Vista Social’s other amazing features. The platform offers a social media engagement feature that includes a Social Inbox. The Smart Inbox brings all audience interactions from connected social media profiles into one place, making it easier to manage conversations without switching between platforms.
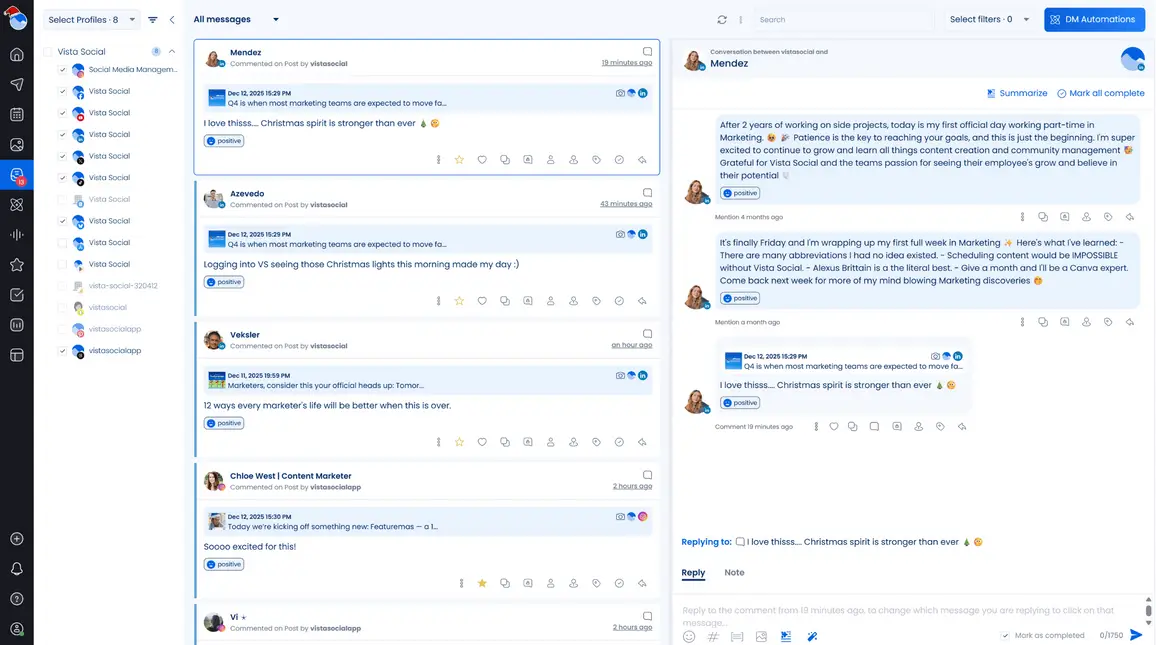
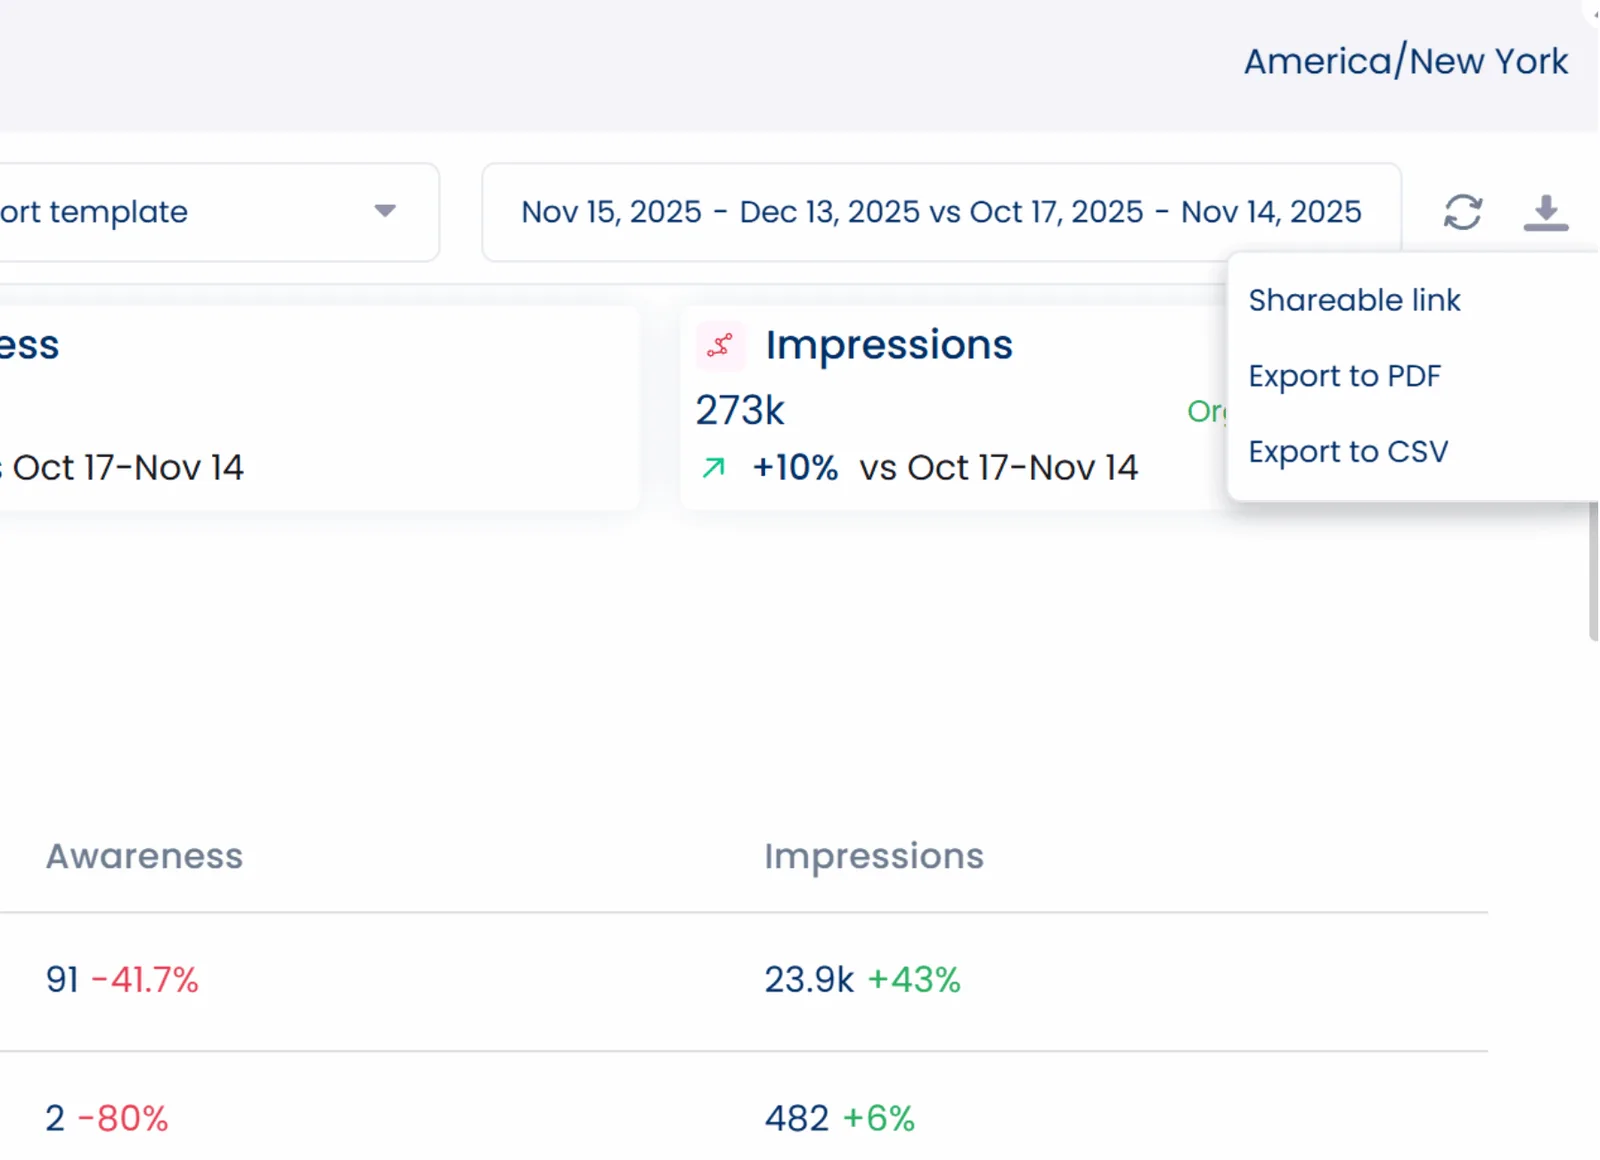
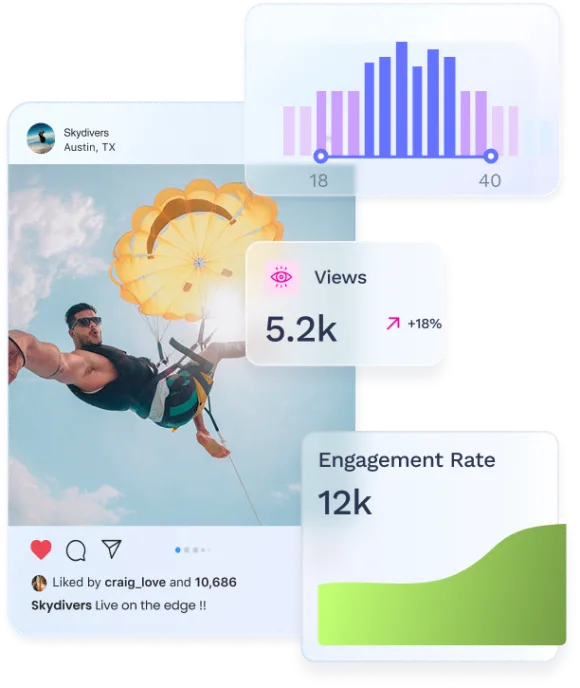
With this feature, you can easily track and manage your clients’ social media interactions while responding in a timely way so no engagement opportunities slip through. The platform’s social media analytics feature provides robust dashboards and reports that simplify performance tracking while making client results easy to understand and share.
The reports now include a grid view, giving you a top-level view of your clients’ key social media metrics from connected profiles for easy tracking and comparison.
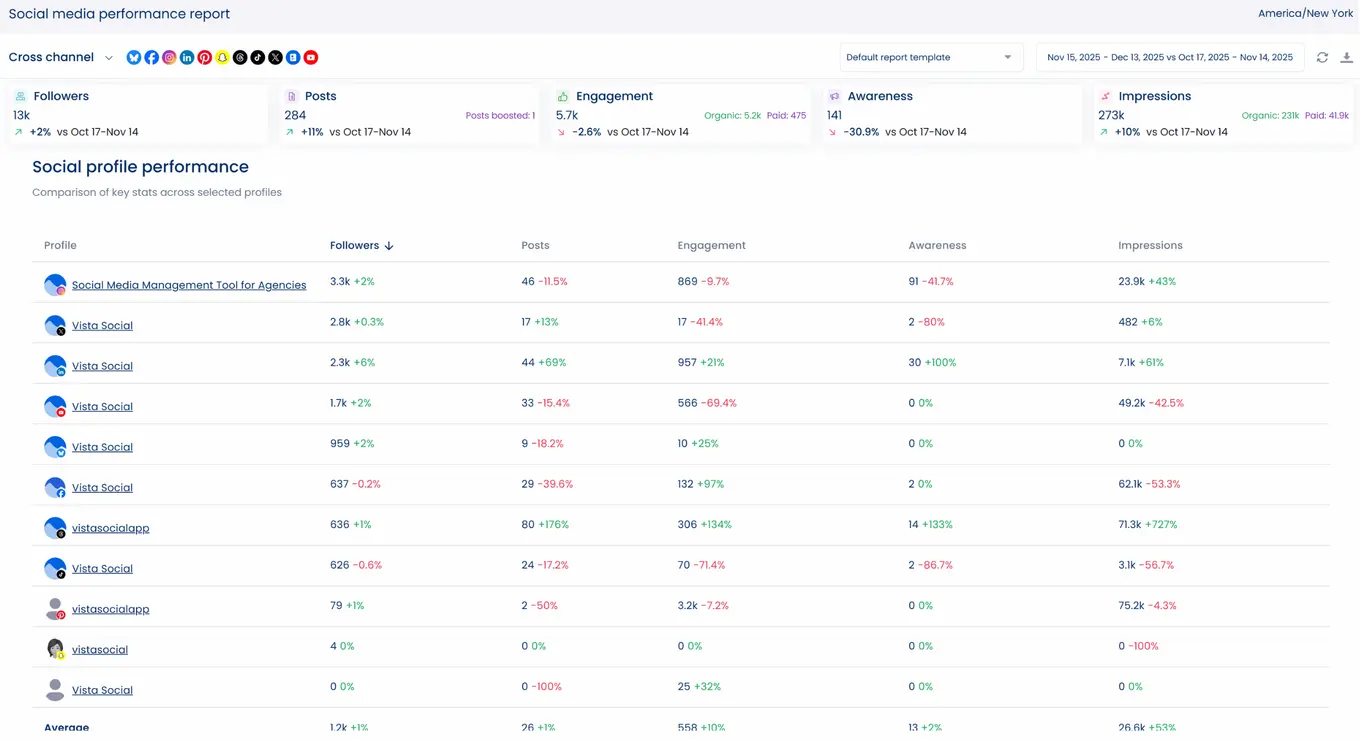
You can create custom reporting templates and schedule your reports to send them to your team or clients automatically. Sharing social media reports is also easier than ever since Vista Social now lets you send shareable links. You can also export your reports as PDF and CSV files and attach them to your emails.
Vista Social’s other key features include the following:
- A social media listening tool that pulls all conversations around your clients’ brands or specific keywords that you can set when creating Listeners
- An automated post approval workflow for efficient content review and approval
- A review management feature that lets you manage and respond to all your clients’ reviews from connected social media profiles in one place
- Creator tools include an AI hashtag and username generator, emoji to text translation, text to emoji conversion, a brand voice generator, a similarity checker, with additional features built in
- Employee advocacy tools and features
- A mobile version of the Vista Social app for seamless social media management on the go
- A link in bio tool that includes customizable landing pages called Vista Page, designed to showcase your clients’ relevant links while supporting lead generation and conversion-focused content
Tips When Promoting Instagram Reels With Photos
Now that you know how to add photos to Reels (or create new Reels from scratch with photos), here are tips to make the most out of them:
Use Other Elements to Convey Your Message
Photo-only Reels can still perform well, but they usually need added context such as on-screen text or a clear narrative to feel as engaging as video-based Reels. Instagram continues to favor content that holds attention and drives interaction. Video does this more naturally than static images unless you actively guide the viewer through what they are seeing.
Since many users expect motion when watching Reels, still photos perform better when you add text or music, with light animation to create movement. Bridge these gaps with helpful captions and text overlays. You can also add informative voiceovers and interactive stickers. Finish by pulling in background music from your library.
The more creative your client’s Instagram reels with photos are, the more audiences they can draw in and engage. Think outside the box and mix and match other elements and add transitions to level up your client’s Instagram photo reel.
Mind the Optimal Instagram Reels Length for Specific Goals
Use the right Instagram Reels length to maximize the marketing benefits of your video content. Shorter Reels often work well for fast consumption, while longer Reels give you more room to educate or persuade. What performs best depends on your goal and how clearly your message comes through.
Repost Your Reels
You can learn how to repost a Reel on Instagram to get the most mileage out of content. Reposting usually means re uploading saved content or sharing an existing Reel again with updated captions or better timing. This gives your content another shot at capturing the target audience’s interest.
Reposting also gives you a chance to test new captions. You can experiment with posting times. You can adjust positioning without creating something brand new.
If your content production team is lagging behind, you can reshare approved content from other creators with permission and proper attribution, keeping in mind that Instagram prioritizes original content for broader distribution. This can help maintain posting consistency when used thoughtfully, though original content remains the strongest driver of reach and long-term performance.
You can also repost User-Generated Content (UGC) but remember to get permission and provide proper attribution.
Posting someone else’s content without permission may violate Instagram’s intellectual property policies, especially if the original creator reports it. Failing to give proper credit can lead to content removal. It can also trigger account restrictions as well as copyright claims.
Failing to follow the rules can land your clients’ accounts in hot water and even get them banned. If that happens, you can submit an Instagram appeal form to request a review and explain what went wrong.
Use High-Quality Photos
Using high-quality photos for your client’s Instagram Reels should be a no-brainer since poor quality images can ruin the audience’s experience and your promotion efforts. Use high-quality images that are clear and vibrant to catch attention and boost engagement on your client’s Reels.
Adopt a Consistent Theme
Consider using a clear theme when you post Reels with photos. Choose one that reflects your client’s brand identity while supporting the campaign message you want to convey. This is also where understanding Instagram branded content helps, since it ensures your photo-based Reels stay compliant when promoting partnerships or sponsored campaigns.
It’s a great way to help raise brand awareness for your clients, making them more recognizable to Instagram target audiences. This approach is exactly how successful Instagram theme pages stay visually consistent while growing engaged audiences around a specific topic.
Optimize your captions
If you want something simple that still stops the scroll, experimenting with one-word Instagram captions can be surprisingly effective for photo-based Reels.
Create attention-grabbing yet short, sweet, and to the point Instagram reel captions for your clients and don’t forget to add hashtags to make the reels on Instagram with photos more searchable and visible. If your Reel feels more like a visual collage or casual slideshow, using well-written photo dump captions can help tie the images together and give viewers a clear reason to keep watching.
Tag or mention relevant accounts when sharing reels that feature or include them to help boost your client’s reach.
Share Your Reels
Share your client’s Reels with photos across Stories and feeds on other social media platforms to help expand their reach. When new viewers land on the profile, clear and compelling Instagram bio ideas help turn that attention into follows and clicks.
You can also collaborate with other Instagram and social media accounts to cross-promote your client’s reels.
Track Your Analytics
Keep an eye on each client’s Reels analytics to understand what the content is doing and who it is reaching. Leverage the data and insights to optimize your client’s promotion strategy for future photo reels on Instagram.
FAQs on How to make a Reel with photos
Can you do reels with photos?
Yes, you can absolutely create reels with just photos. When creating a reel, tap the gallery icon and select your favorite photos to add them to your reel.
How do you make an Instagram reel with pictures and videos?
Open the Reels creator and tap the gallery icon. Choose the photos or videos you want to use. You can rearrange everything later inside the editor.
How many photos can you add to a reel?
Create a Reel, then tap the gallery icon. Choose the photos or videos you want to include. You can adjust their order later.
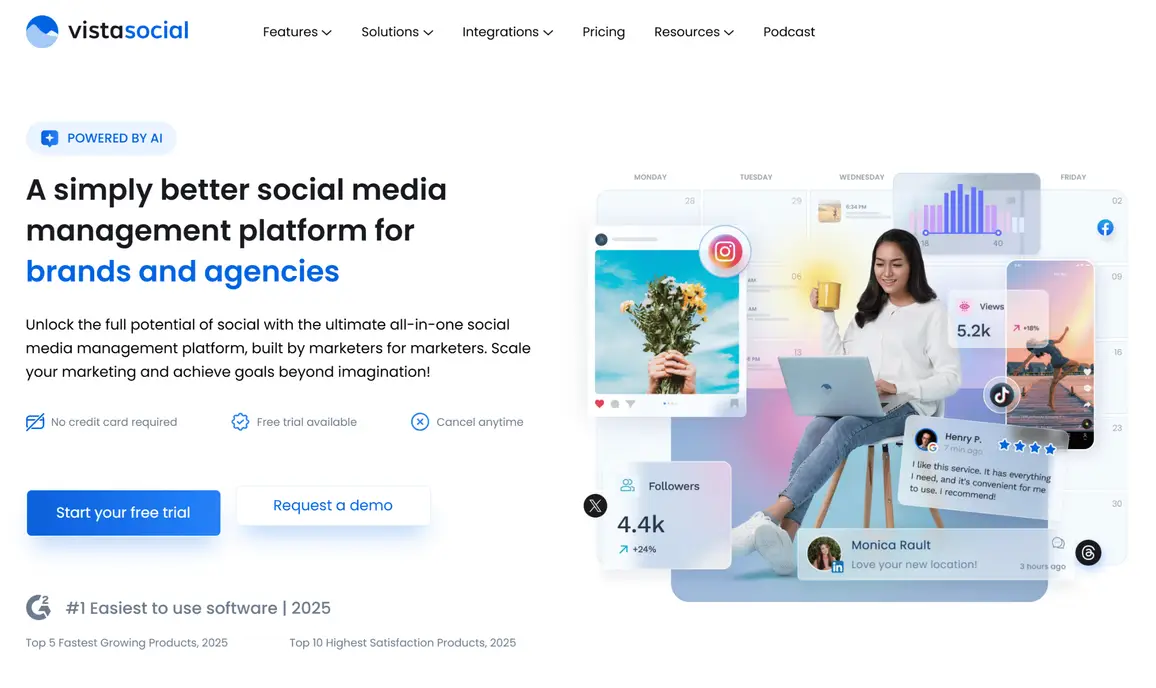
Try Vista Social for free
A social media management platform that actually helps you grow with easy-to-use content planning, scheduling, engagement and analytics tools.
Get Started NowAbout the Author

Content Writer
Jimmy Rodela is a social media and content marketing consultant with over 9 years of experience, with work appearing on sites such as Business.com, Yahoo, SEMRush, and SearchEnginePeople. He specializes in social media, content marketing, SaaS, small business strategy, marketing automation, and content development.
Loading related tools...
The most complete social media management platform for teams who demand more.


Tools
PublishingAnalyticsEngagementIntegrations
FacebookInstagramLinkedInRedditSnapchatThreadsTikTokX (Twitter)YouTubeMCPVista Page (link-in-bio)All IntegrationsCopyright © 2026 Vista Social LLC. All Rights Reserved.