

Published on June 8, 2026
12 min to read
18 Canva Hacks for Better Social Media Designs

Summarize with AI


Table of contents
Summarize with AI

ChatGPT

Claude

Perplexity
Share

Vista Social

X (Twitter)


You’ve probably scrolled past a carousel on Instagram and thought “Sheeesh! That looks clean. They must have a designer.” Or seen a LinkedIn post with perfect typography and subtle brand colors and wondered how they pulled it off. Then you open Canva, pick a template, and somehow your version looks like a rough draft next to theirs.
That’s what kids these days call “skill issue”. You might be using the same tool, but the output isn’t even close.
Most of the time, the difference comes down to a handful of features that people don’t know exist. These aren’t design skills you need years of training for. They’re Canva tips and tricks that take minutes to learn and immediately change how your content looks and how long it takes to make.
This list breaks it down into 18 Canva hacks you can start using today. Whether you’re a social media manager cranking out daily posts, a freelancer juggling multiple client brands, or an agency team trying to keep designs consistent at scale, you’ll find Canva tricks and workflow shortcuts here that save real time and make your social media designs noticeably sharper.
Table of contents
18 Canva hacks every social media designer should know
With over 265 million monthly active users, Canva is the most popular design tool on the planet. But most of those users never move past basic templates and stock photos. These Canva hacks for designers and content creators cover three areas: making your designs look more professional, cutting your production time, and keeping your brand consistent across every platform.
1. Use the “Tidy Up” alignment shortcut to fix uneven spacing
Sometimes a design just looks “off” and you can’t figure out why. Nine times out of ten, it’s uneven spacing between elements. Manually adjusting the gaps between text blocks, icons, or images is tedious, and you’re basically guessing. Here’s how to fix that:
- Select all the elements you want to align.
- Click on Position, then under Space evenly, select Tidy up.
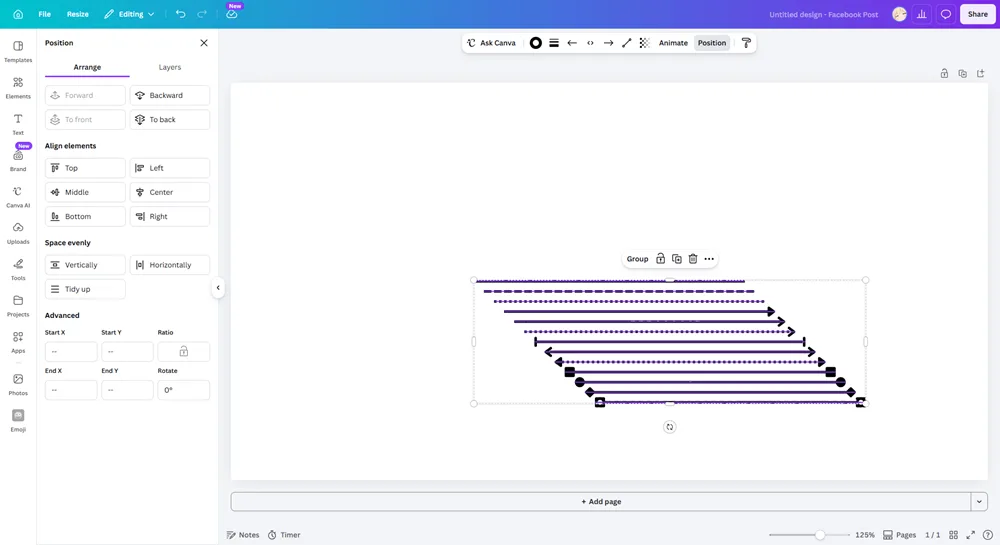
- Viola! Canva instantly applies equal spacing between all the elements that you selected.
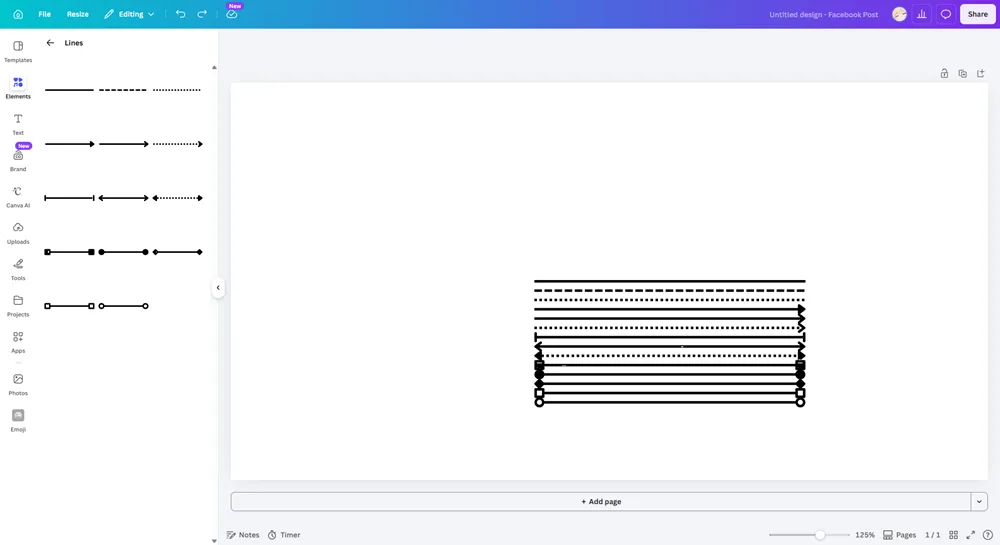
This works on grouped elements too. Select a row of icons, hit Tidy Up, and they’ll snap into perfectly even spacing without any guesswork.
2. Use the duplicate-and-background-remove trick for depth
Most Canva designs sit flat on the page, but that layered, magazine-cover look where text sits between the foreground and background of a photo? You can pull that off in Canva without touching Photoshop!
- First, drop in your photo, then duplicate it.
- Run Background Remover on the top copy so only the subject remains.
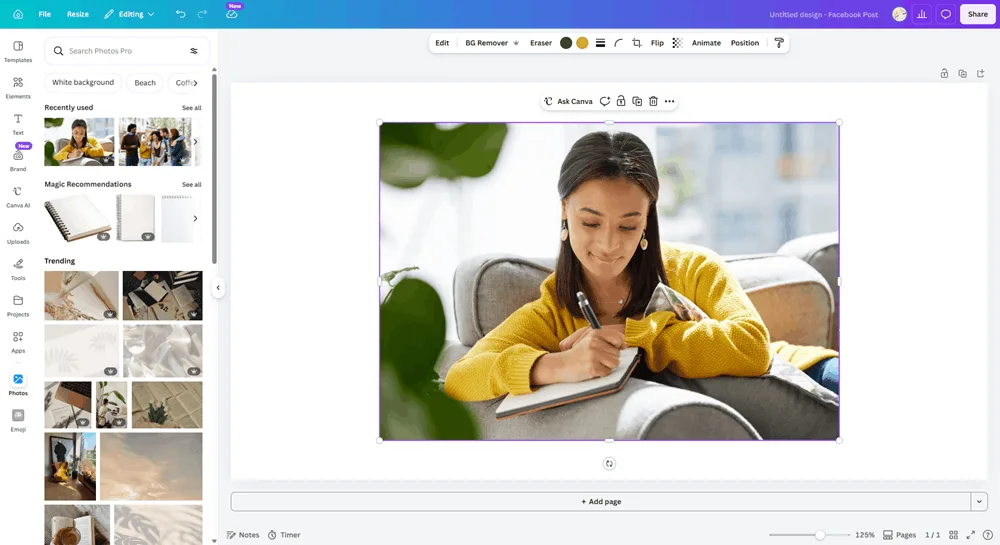
- Now place your text, a color overlay, or other design elements between the two layers.
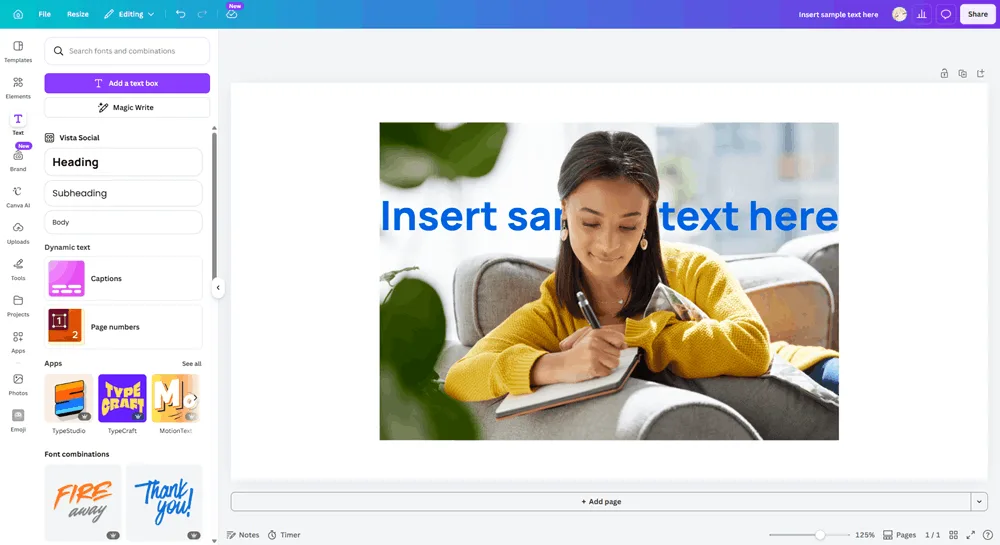
This technique works great for quote cards, team member spotlights, and customer testimonial graphics. A standard flat post suddenly looks like it had actual thought behind the composition.
3. Learn the keyboard shortcuts that save real time
Clicking through menus adds up fast when you’re producing 10 to 15 social graphics a week. A few keyboard shortcuts can cut minutes off every session.
Here are the essentials:
- T for text
- R for rectangle
- L for line
- Ctrl/Cmd + D to duplicate any element
- Alt + drag creates a copy of whatever you’re moving
- Shift + drag resizes elements proportionally so your photos don’t stretch awkwardly
Investing 10 minutes to memorize these shortcuts will save you hours over the course of a month. Once they’re second nature, clicking through menus will feel painfully slow.
4. Use the color picker on photos to build a custom palette
Choosing colors that work together is one of the hardest parts of design for non-designers. If your social posts use colors that clash with your images, the whole thing looks disjointed.
Upload a brand photo or a lifestyle image that matches your aesthetic. Click on any color field in Canva, then use the eyedropper tool to pull hex codes directly from the photo. You’ll get a palette that naturally harmonizes with your imagery because the colors literally come from the same source.
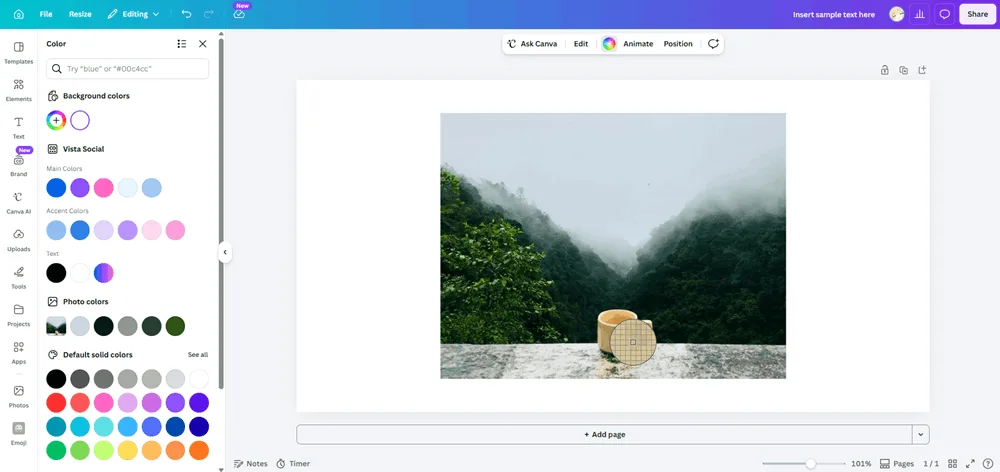
Save those colors to your Brand Kit so you never have to repeat the process. No more second-guessing which shade of blue goes with your brand photos.
5. Magic Resize: one design, every platform in 90 seconds
Resizing a single Instagram post into LinkedIn, Facebook, Pinterest, X, TikTok cover, and Story formats used to mean creating each version from scratch. That’s easily 30 minutes of repetitive work.
Magic Resize (part of Canva Pro) lets you select multiple output sizes at once and generates resized versions in a single click. Your Instagram square becomes a LinkedIn landscape, a Pinterest pin, and a Story format in about 90 seconds.
- When you’re done with your piece, go to Resize.
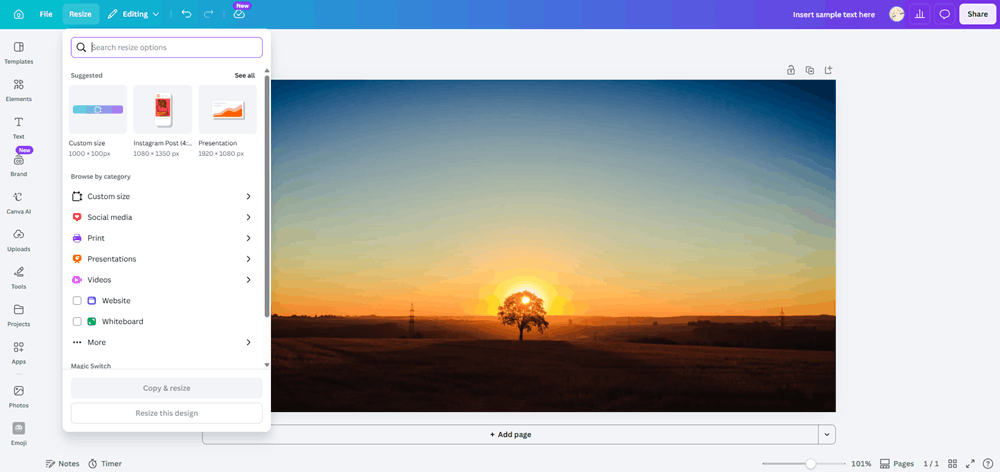
- Go to Social Media, and choose as many or as little sizes that you want to do.
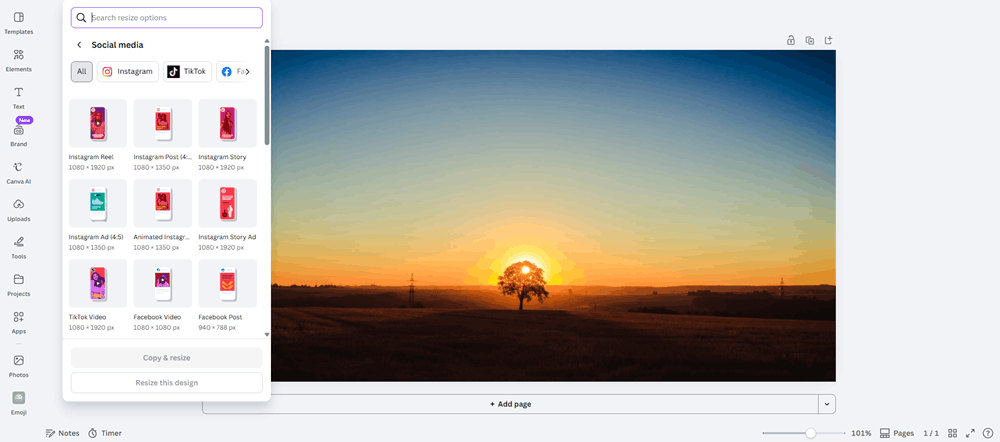
- You can either Copy & resize, which creates a new file, or Resize the design, which will change your current working file.
Rachael, a B2B Content Strategist at Canva, used Magic Resize to adapt a single campaign design across Facebook, LinkedIn, email, and webpage formats. “It saved me up to 8 hours of editing time per campaign,” she shared. “Instead of manually adjusting dimensions or copy-pasting elements across designs, everything was automatically resized for each platform.”
When you pair this with a social media publishing tool that supports cross-network scheduling, you go from one design to published posts across every platform without leaving your workflow. Vista Social’s Canva integration is built for exactly this: resize in Canva, push every version straight to your publishing queue.
6. Bulk Create: 30 personalized designs in 5 minutes
If you’ve ever spent an afternoon making individual graphics for employee spotlights, client features, or stat cards, Bulk Create is about to give you that afternoon back. Most Canva users don’t even know this feature exists, which is a shame because it’s one of the most powerful things the platform offers.
- First, go to Apps.
- Scroll down until you see Bulk create under More from Canva.
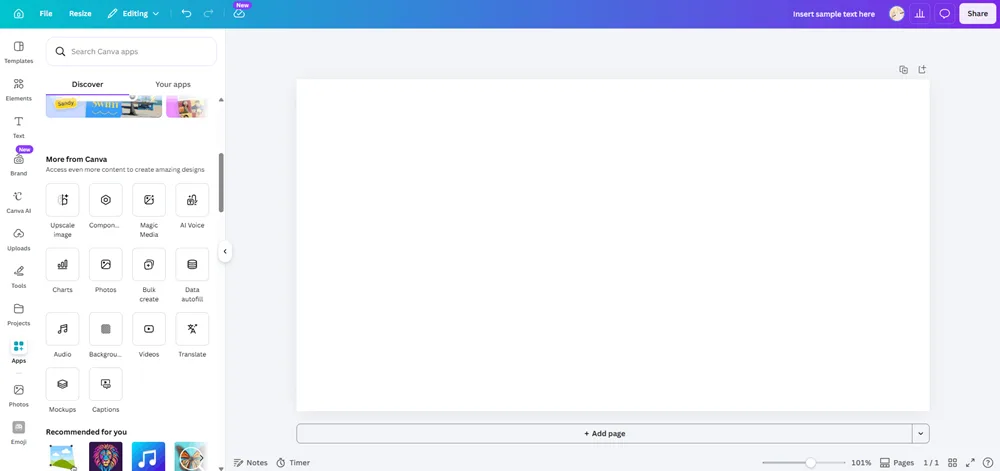
- Select any data source (from Sheets to a CSV file) or manually enter your data.
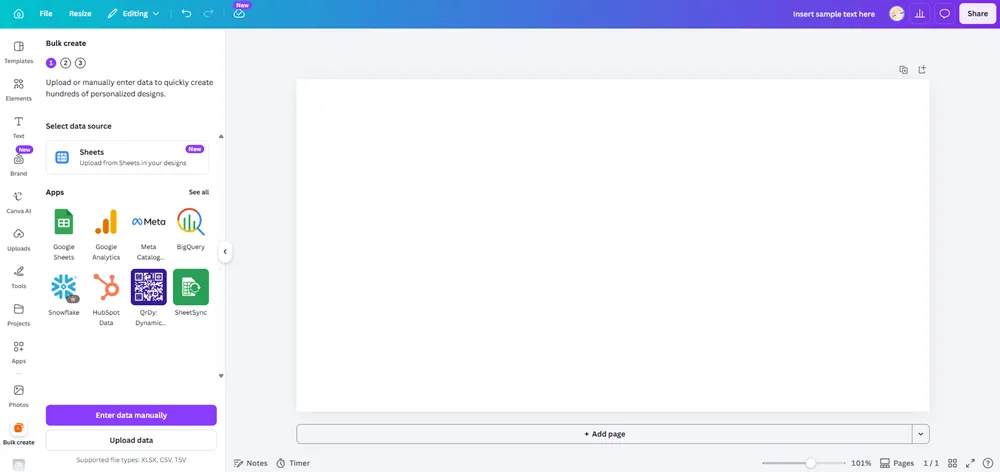
- Canva should automatically generate one design per row automatically.
Agencies managing multiple client accounts love this for recurring series like weekly tips, team intros, or data highlights. Build the template once, swap in a fresh CSV every week, and you’re done.
7. Save your most-used designs as templates
Canva’s built-in template library is massive, but the templates that save you the most time are your own. If you create the same type of post every week (a tip graphic, a testimonial card, a stat post), save it as a personal template and reuse it.
Open your finished design, click Share, then “Template link.” You can also organize them inside a dedicated Canva project folder. Next time you need that weekly tip post, you start from your own layout instead of rebuilding it from memory.
This cuts design time in half across a month, especially for teams that produce recurring content series. It also keeps your layouts consistent without relying on anyone’s memory of how last week’s post was built.
8. Use the upload-PDF-to-edit hack for old assets
Every brand has dusty one-pagers, brochures, or sell sheets sitting in a shared drive somewhere. The original design files are long gone, but the content still needs updating.
Upload that old PDF directly into Canva and it’ll convert the file into an editable design. Text becomes editable, images stay in place, and you can modernize the layout, swap in updated branding, and export a fresh version without starting from zero.
How to start is simple:
- Click on Create a design.
- Go down to the Upload option.
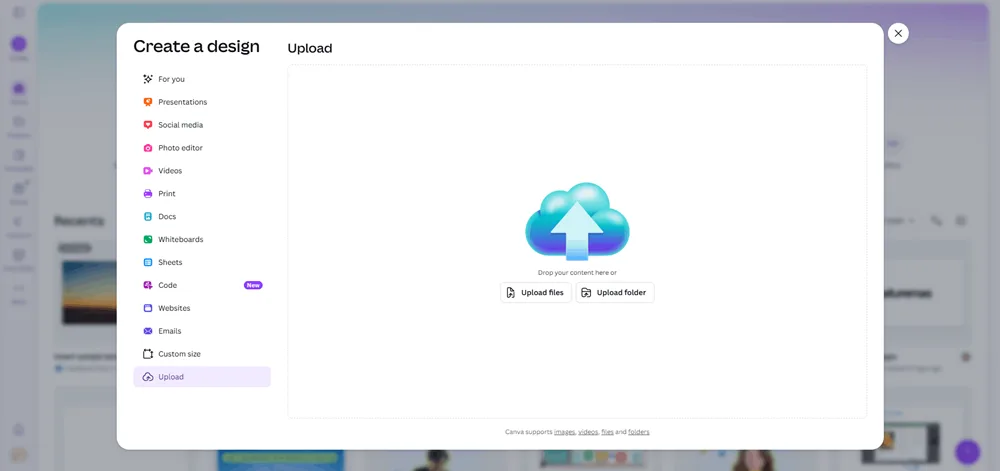
- Select a PDF file and get to work.
It’s not perfect for every PDF (heavily layered files can get messy), but for standard marketing one-pagers and flyers, it does a surprisingly good job. Beats rebuilding the whole thing from scratch when you just need to update a few details.
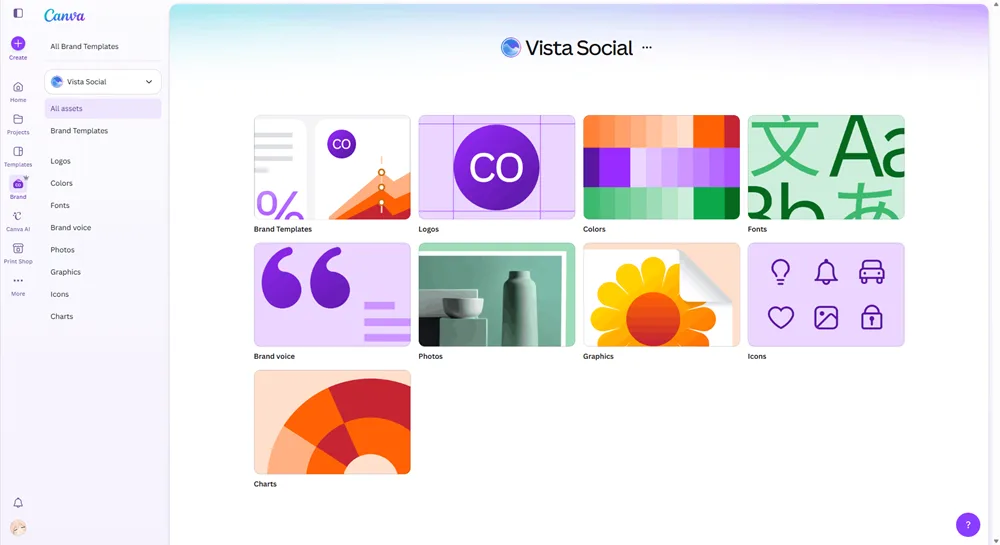
9. Set up Brand Kit properly once, save hours every week
Most Canva users set up a partial Brand Kit (maybe a logo and one or two colors) and then forget about it. That’s leaving the best part of the feature on the table.
Remember to do it properly the first time (and every time you need to change things moving forward): upload every logo variation you use, enter your exact hex codes for primary, secondary, and accent colors, and add your brand fonts (you can upload custom fonts with Canva Pro).
Then add any recurring graphic elements or textures your brand uses regularly. The initial setup takes about 30 minutes, but it saves 30 seconds on every single design you create after that. Over hundreds of designs a year, those seconds add up fast.
Of course, the Vista Social team also has our brand kit set up on Canva!
This is also where strong social media branding starts. Brands with a consistently presented identity can see up to 33% more revenue than those without one. Your Brand Kit is the foundation that keeps every post on brand, whether you’re designing it or a teammate is.
10. Magic Write for caption variations (not first drafts)
Magic Write, Canva’s built-in AI writing tool, is decent at generating text from scratch, but it’s much better at riffing on something you’ve already written. Starting from a blank page will almost always give you a generic result.
Instead, write your first draft yourself. Then ask Magic Write to generate five variations with different tones, lengths, or hooks. Pick the best phrase from each and combine them into something stronger than any single version. Think of it less as a writer and more as a sounding board that gives you options.
This is especially useful when you need to adapt one caption across platforms where the tone differs (LinkedIn professional vs. Instagram casual, for example).
11. Dream Lab for on-brief visual options
Stock photos have a sameness problem. When every brand in your niche uses the same “person smiling at laptop” image, your feed blends into everyone else’s. Dream Lab, Canva’s AI image generator, gives you a way around that.
Upload a reference image or describe a visual concept. Dream Lab generates variations that match the mood and style without pulling from the same overused library. It’s best for abstract backgrounds, conceptual visuals, and mood-setting imagery, though it’s less reliable for specific product shots or realistic portraits.
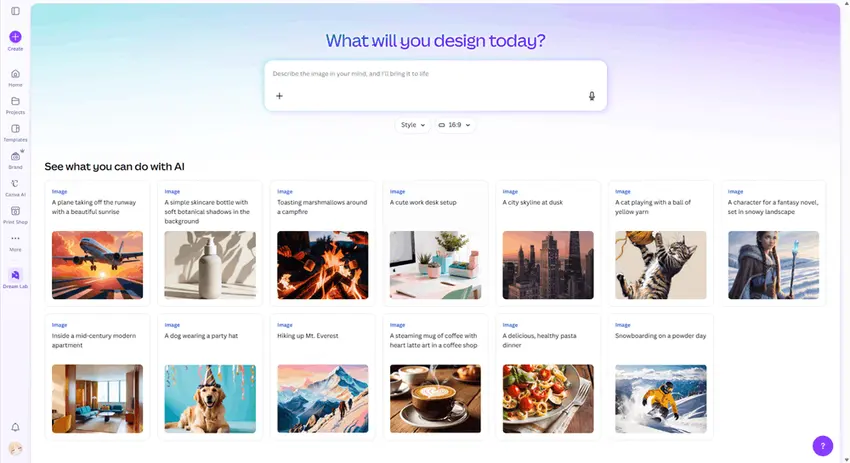
Marco, a Brand Designer at Canva, takes a similar approach when starting new campaigns: “When I am putting together a storyboard for a video, I’ll start by using Magic Media to quickly visualize and storyboard my concept.” That speed lets you present first drafts to stakeholders and get alignment faster.
12. Magic Edit + Magic Expand for “fixing” not-quite-right photos
You found the perfect photo for an Instagram Story, but it’s cropped too tight and there’s a distracting trash can in the corner. Before these tools, you’d either settle for the flawed photo or spend 20 minutes in Photoshop.
Magic Expand extends the edges of a photo by generating plausible background content with AI. A tightly cropped landscape photo becomes a full Story-width image in seconds. Magic Edit goes further: select an object in the photo, describe what you want to replace it with, and the AI swaps it out.
Together, these two features go well beyond Background Remover. If a photo is close to what you need but not quite there, Magic Edit and Magic Expand can close the gap without opening a separate editing app.
13. Magic Translate for multi-language social campaigns
Running social campaigns in multiple languages usually means duplicating every design and manually replacing text. Magic Translate handles this inside the design itself. It translates the text while keeping your layout, fonts, and spacing intact.
For brands running localized campaigns across regions (or agencies with international clients), this cuts out hours of duplicate design work. Pair it with Canva’s built-in Accessibility Checker to make sure your translated output is still screen-reader-friendly.
14. AI Auto-Captions for video accessibility
Most social media videos autoplay on mute in people’s feeds. If your video doesn’t have captions, viewers scroll right past it. Adding captions manually is slow and tedious.
Canva’s AI Auto-Captions generate subtitle text from your video audio with one click. You can customize the font, color, and placement to match your brand. Then export the video with burned-in captions that work across every platform.
Default to turning this on for every video post. It makes your content accessible to more viewers, and videos with captions tend to hold attention longer in muted feeds.
15. Use Canva’s Content Planner only as a sketch, then publish from your social tool
Canva’s built-in Content Planner works fine if you’re a solo creator posting to one or two accounts. But for teams and agencies, it falls short fast. It doesn’t offer analytics, social listening, engagement management, or approval workflows.
Use Canva’s planner to visually sketch your content calendar during the brainstorm phase, then move to a dedicated platform for scheduling, approvals, and publishing. It’s the difference between a sketchpad and a full content planning system.
Vista Social’s Canva integration was designed with this workflow in mind. Design in Canva, then push your designs directly into Vista Social to schedule, get team approvals, and publish across every network from one place.
16. Bidirectional Canva integration: stop downloading and re-uploading files
If your current workflow involves exporting from Canva, downloading the file, then uploading it into a separate scheduling tool, you’re wasting five or more minutes per post. Over a week of content, that adds up to hours.
Modern social media tools integrate directly with Canva so you skip the download-upload cycle entirely. You design inside Canva (or inside your social tool’s built-in Canva editor), and the finished asset lands in your publisher ready to schedule. Some integrations even sync edits, so when you update a design in Canva, the new version appears in your media library automatically.
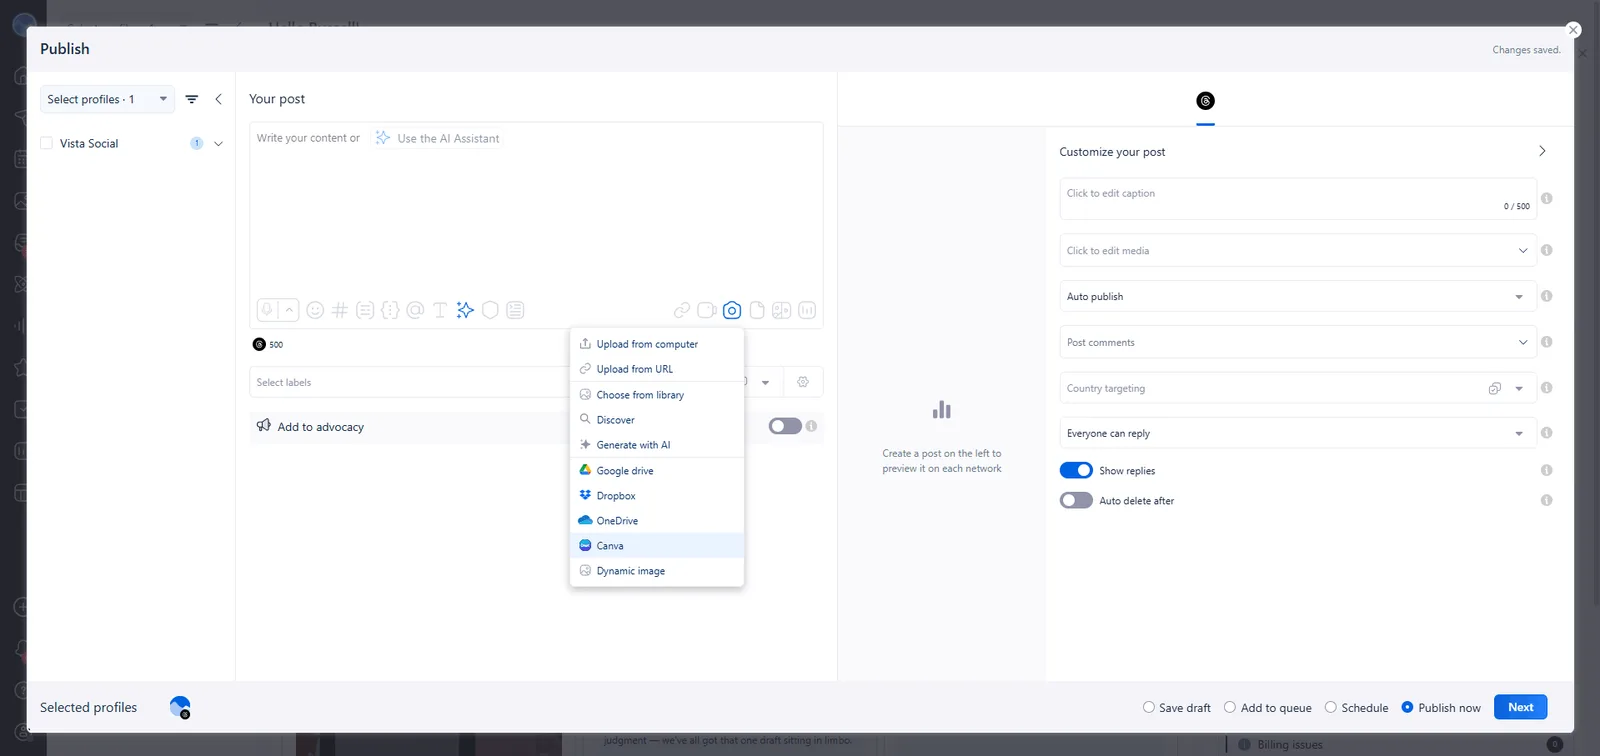
Vista Social offers this kind of bidirectional Canva integration. You can access the Canva editor directly inside Vista Social’s publisher using the Canva Button, or you can push designs from Canva into your Vista Social media library through the Canva app integration. Either direction, no downloading required.
17. Use Canva’s mobile app for edits on the go
Canva’s mobile app isn’t just a stripped-down preview tool. It’s surprisingly capable for quick fixes when you’re away from your desk.
Spotted a typo right after a post went live? Need to swap a color for a last-minute client request? The mobile app lets you open any of your designs, make text edits, adjust colors, swap images, and re-export without opening a laptop. It won’t replace your desktop workflow for building designs from scratch, but it keeps small fixes from piling up until you’re back at your desk.
18. Build a “social media style guide” Canva project as your team’s source of truth
Brand consistency breaks down when teammates, freelancers, and contractors interpret your brand differently. A Brand Kit handles colors and fonts, but it doesn’t show people how to use them. That’s where a dedicated style guide project comes in.
Create one Canva project with about eight pages, each covering a different element of your visual brand: typography hierarchy, color usage rules (primary vs. accent vs. background), photo treatment guidelines, do-and-don’t design examples, and thumbnail previews of your go-to templates. Share the project link with every new team member, freelancer, or contractor who touches your brand.
This cuts onboarding from days to about an hour and prevents the vast majority of off-brand designs before they reach the review stage. Unlike a PDF style guide that sits forgotten in a shared drive, a Canva project is alive. You can update it anytime and everyone with the link always sees the latest version.
Try Vista Social for free
A social media management platform that actually helps you grow with easy-to-use content planning, scheduling, engagement and analytics tools.
Get Started NowAbout the Author

Content Writer
Russell Tan is a content marketing specialist with over 7 years of experience creating content across gaming, healthcare, outdoor hospitality, and travel—because sticking to just one industry would’ve been boring. Outside of her current role as marketing specialist for Vista Social, Russell is busy plotting epic action-fantasy worlds, chasing adrenaline rushes (skydiving is next, maybe?), or racking up way too many hours in her favorite games.
Loading related tools...
The most complete social media management platform for teams who demand more.


Tools
PublishingAnalyticsEngagementIntegrations
FacebookInstagramLinkedInRedditSnapchatThreadsTikTokX (Twitter)YouTubeMCPVista Page (link-in-bio)All IntegrationsCopyright © 2026 Vista Social LLC. All Rights Reserved.